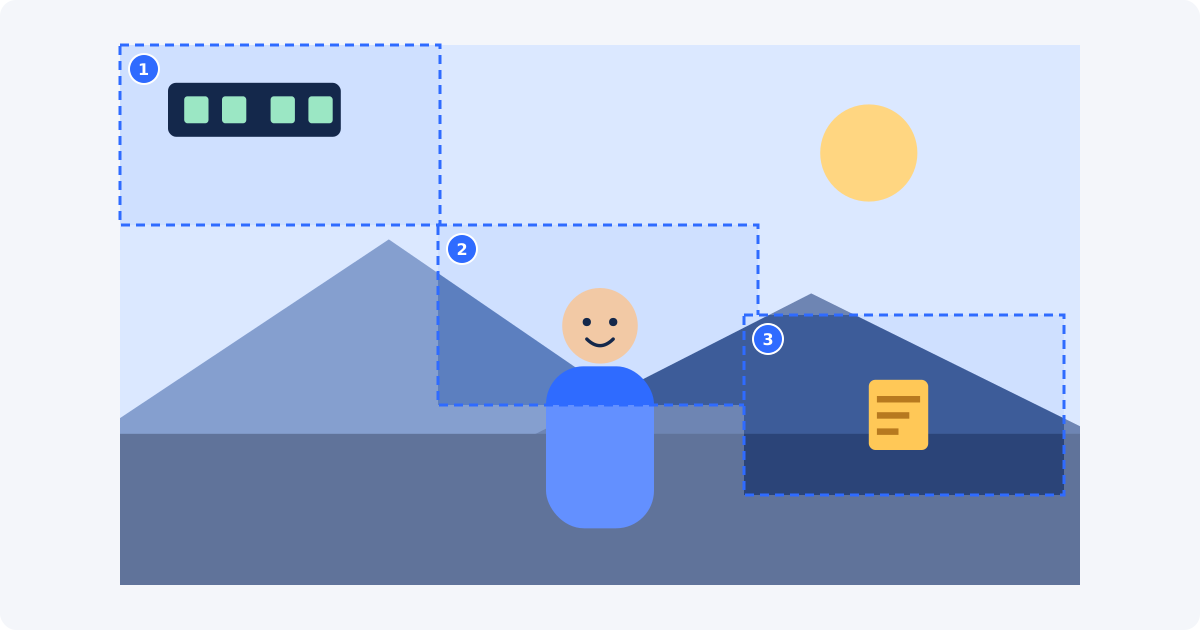
Spatial area versus time segment
People use "one part of a video" in two ways, and the workflow is different for each.
- One spatial part of the frame. A region of the picture, such as a face in the upper-right corner, a product on a table, or a score display. The zoom shows this region for the entire clip.
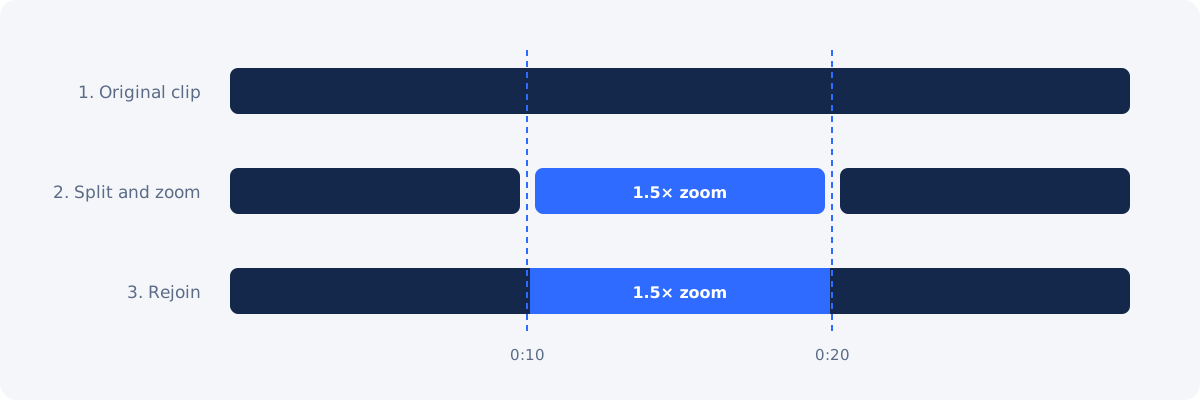
- One time segment of the video. A span of the timeline, such as seconds 10–20. The video plays normally, shows a closer view during that span, and then returns to the full frame.
The standalone tool handles the first case directly. It applies one zoom level and one position to the complete exported clip, and the framing does not change over time. For the second case, you split the video into sections, zoom only the section you need, and join the pieces again. If you want the zoom to change gradually, continue in the full editor and use timeline keyframes.
The sections below start with the spatial case, since it is the basis for both. You can focus on a specific part of a video in a few steps once you know what to look for.
Selecting an appropriate zoom level
The zoom level decides how much of the original picture remains visible. At 1.5× you see about two thirds of the width and height. At 2× you see half of each. At 4×, the maximum, you see a quarter of each.
Pick the level by asking how large the subject needs to be, not how large it can be. A face that fills the whole frame is uncomfortable to watch and leaves no room for movement.
Stronger zoom also enlarges a smaller group of source pixels, which can reduce perceived sharpness. Our guide on zooming in while minimizing quality loss explains how to estimate a safe level for your source.
Dragging and repositioning the source
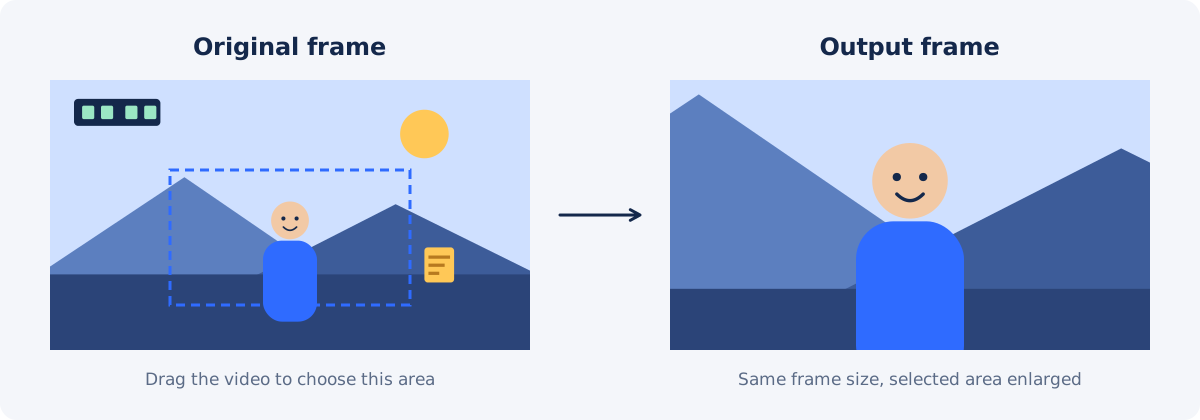
After the zoom level is set, the picture is larger than the frame, so only a window of it is visible. Dragging the video in the preview moves the picture behind that window. Drag left to reveal content on the right, and drag down to reveal content at the top.
For exact placement, use the horizontal and vertical position fields. The Center video button returns the picture to the middle.
Keeping the subject inside safe frame boundaries
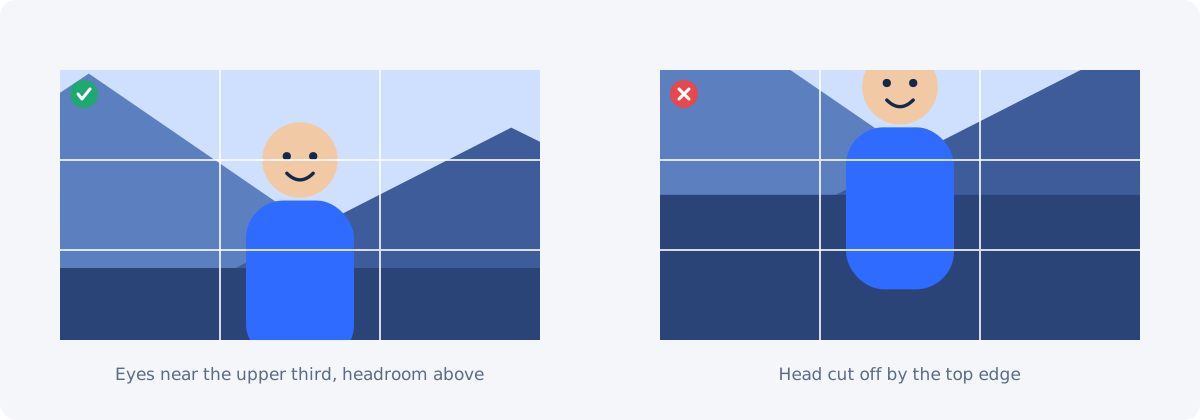
Leave a margin between the subject and the edges of the frame. A subject that touches the border looks cramped, and any small movement will cut it off. A margin of around 5–10% of the frame on each side is a reasonable starting point.
For people, the rule of thirds is a helpful guide. Imagine the frame divided into a 3 × 3 grid. Placing the eyes near the upper horizontal line usually gives natural headroom, which is the space between the top of the head and the top of the frame.
Checking movement throughout the timeline
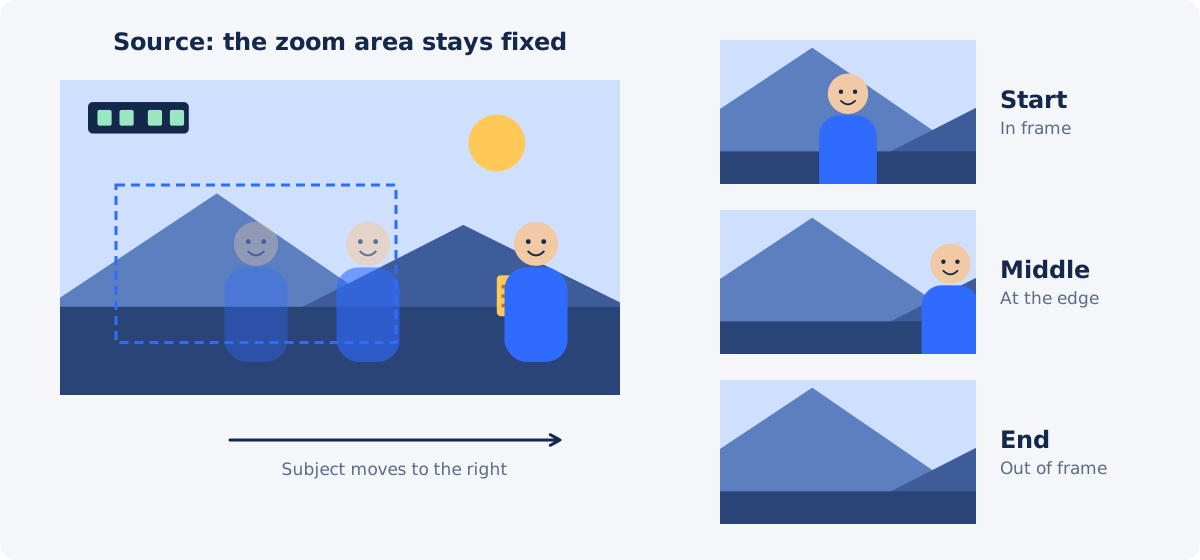
The selected zoom and position remain fixed throughout the output. The tool does not follow the subject. A framing that looks right on the first frame may be wrong ten seconds later, when the person leans, walks, or the camera shifts.
Before applying the zoom, play the complete clip in the preview, or scrub through it. Look for the moments where the subject is farthest left, right, up, and down. Set the zoom and position so that all of those moments stay inside the frame. This often means choosing a slightly lower zoom than the first frame suggested.
Quick reference by goal
| Goal | Zoom recommendation | Positioning advice | Main risk |
|---|---|---|---|
| Focus on a face | Mild to medium | Keep eyes near the upper third | Cutting off the head |
| Highlight product detail | Medium | Center the important feature | Softness from excessive zoom |
| Enlarge interface text | Moderate | Keep the text away from edges | Text becoming blurry |
| Focus on gameplay element | Mild | Check the complete timeline | Subject moving out of frame |
| Zoom one time segment | Split the clip first | Apply zoom only to that section | Visible jump between sections |
Working with faces, text, products, and screen recordings
Faces
Viewers are sensitive to how faces look, so keep the zoom mild to medium and check eyes and hair in the preview. Leave headroom, and leave a little more space on the side the person is facing.
Text
Letters have thin, high-contrast edges that show blur quickly. Zoom moderately, keep the full line of text inside the frame, and pause the preview to confirm you can read it.
Products
Center the feature you are showing, such as a button, a label, or a texture. If hands move the product around during the clip, frame for the whole range of movement.
Screen recordings
Interfaces are mostly static, which suits a fixed zoom well. The risk is that the important action moves, for example when the cursor leaves the zoomed panel to open a menu elsewhere. Watch the whole recording before you commit.
How to zoom only one time segment by splitting the clip
When the closer view is needed only for part of the video, work in three stages.
- Split the video into sections. Use Trim Video to save the part before the zoom, the part to be zoomed, and the part after it as separate clips. Note the exact cut times so that no frames are lost or repeated.
- Zoom the middle section. Upload only that clip to the Zoom Video tool, set the level and position, preview, and apply.
- Rejoin the sections. Combine the three clips in their original order with Merge Videos or in the full editor.
The result changes framing instantly at each cut. This is a normal editing technique, often called a punch-in, and it works well on a change of sentence or action. It will look like a jump if it lands in the middle of a movement.
If you want the picture to glide from the wide view into the close view, that is an animated zoom. The standalone tool does not change zoom over time. Continue in the full editor and use timeline keyframes for that effect.
Step-by-step: zooming into an area with Deus.Video
- Upload your video. MP4, MOV, AVI, WebM, and MKV files are supported.
- Set the zoom level. Choose a preset or adjust the zoom level control. Start around 1.2×–1.5×.
- Drag the video to the area you want. Fine-tune with the horizontal and vertical position fields if needed.
- Play the complete clip. Confirm the subject stays inside the frame and has some margin at every point.
- Adjust. Lower the zoom if the subject leaves the frame or the picture looks soft.
- Apply the zoom. The selected level and position are applied to the whole clip.
- Download the result or continue editing.
Ready to bring a detail closer? Open Deus.Video to zoom and reposition your video, then preview the full clip before you export.
Practical scenarios
Face in a group shot
One person is speaking in a wide shot of five. Zoom to about 1.5×–2× and position the speaker with eyes near the upper third. Include neighbors clearly or exclude them clearly, so no face is cut by the frame edge.
Product demonstration
The product sits on a desk and fills a small part of the frame. A medium zoom centered on the product works if it stays in place. If the presenter lifts it toward the camera, frame for the lifted position too.
Slide or screen recording
A presentation was recorded with a large empty margin around the slide. A mild zoom removes the margin and makes the text larger. Keep the whole slide inside the frame.
Scoreboard or gameplay detail
Interface elements in games sit in fixed corners, so a fixed zoom can hold them well. The trade-off is that the action in the rest of the frame disappears. For a highlight clip, consider zooming only the segment where the detail matters.
Moving subject
A child runs across the garden from left to right. No single strong zoom can hold them. Use a mild zoom that covers the whole path, split the clip into shorter sections with different positions, or use keyframes in the full editor to move the frame with the subject.
Zoom only during a selected section
In a two-minute tutorial, one setting needs a closer look between 0:40 and 0:55. Split at those times, zoom the 15-second section, and rejoin. Place the cuts at natural pauses in the narration.
Common positioning mistakes
- Framing only the first frame. The subject moves later and leaves the view. Always check the full timeline.
- Centering everything. A face in the exact middle of the frame leaves too much empty space above the head. Move the eyes toward the upper third.
- Cutting at joints or through faces. Frame edges that cross a chin, a wrist, or a neighbor's face look accidental. Move the edge to a cleaner spot.
- Zooming until the subject fills the frame. It leaves no margin for movement and increases softness. Step back one level.
- Using zoom where crop fits better. If the output does not need to keep its dimensions, Crop Video keeps the selected area at its original pixel scale.
Conclusion
Zooming into one area comes down to two settings, level and position, and one check: the complete timeline. Choose the lowest zoom that makes the subject clear, leave margins, and confirm the subject stays in view to the last frame. When the close view is needed only for a moment, split the clip, zoom the middle section, and rejoin it. For gradual or moving zooms, use keyframes in the full editor.
Frequently asked questions
Can I zoom into a corner of the video?
Yes. Increase the zoom and drag the picture until the corner fills the frame. The view cannot extend past the edge of the original picture, so a subject in the far corner will stay near the edge of the zoomed view unless the zoom is fairly strong.
Can I use two different zoom areas in one video?
Not in a single pass of the standalone tool, because it applies one position to the complete clip. Split the video into sections, give each section its own zoom and position, and merge them. The full editor with keyframes is the alternative for smooth changes.
Will the zoomed video have the same dimensions as the original?
Zooming enlarges the picture inside the output frame and does not shrink the frame, which is the main difference from cropping. If you need different dimensions or a different aspect ratio, resize or crop as a separate step.
How do I avoid a visible jump when zooming only one segment?
Place the cuts where something already changes: a new sentence, a gesture, a click. Keep the zoom moderate so the change in framing is clear but not jarring. If you need a smooth transition, animate the zoom with keyframes in the full editor.
Sources
- Deus.Video, Zoom Video tool page – 1×–4× range, drag and position fields, fixed framing for the complete clip, keyframes in the full editor: https://deus.video/zoom-video/ (checked September 18, 2026)
- Wikipedia, "Rule of thirds" – placing a person's eyes on a horizontal third line: https://en.wikipedia.org/wiki/Rule_of_thirds
- Wikipedia, "Digital zoom" – enlarging a cropped area adds no resolution: https://en.wikipedia.org/wiki/Digital_zoom


