Design text: titles, labels, callouts, and calls to action
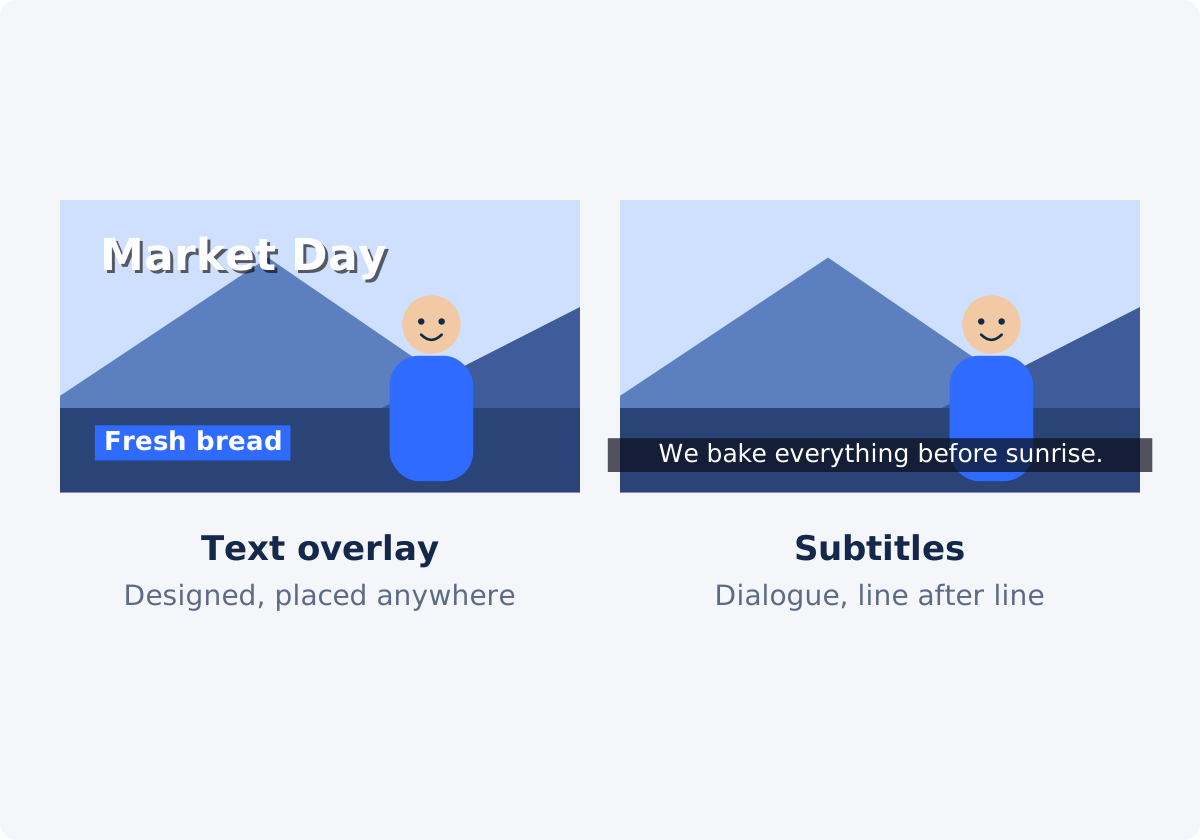
An overlay is anything drawn on top of the video picture. A text overlay is text that you add as part of the design of the video. It does not depend on the soundtrack. It would make sense even with the sound off and nobody speaking.
- Title. Names the video or a section: "Market Day," "Part 2: Setup."
- Label. Identifies something on screen: a speaker's name, a location, a product.
- Callout. Points attention at a detail or a step: "Tighten this screw first."
- Call to action. Tells the viewer what to do next: "Full recipe in the description."
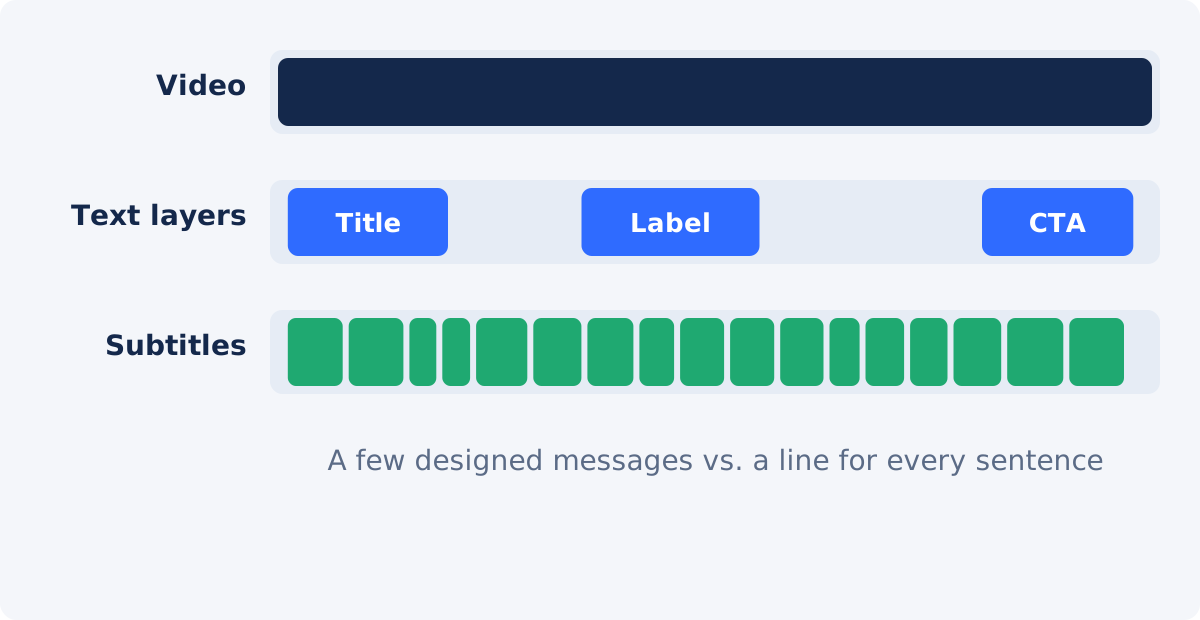
Design text has a few things in common. There are only a handful of items per video. Each one has its own look and position. And each stays on screen for seconds, not for the length of a spoken phrase.
Subtitles and captions: a timed version of speech
Subtitles follow the dialogue. Each line appears when the words are spoken and disappears when the next line arrives. Even a short interview can contain dozens of lines. They share one consistent style and one position, because their job is to be read quickly and then get out of the way.
Several related terms are often mixed up, so it is worth being exact.
- Captions are a text version of the speech and of the non-speech audio needed to understand the content, such as "[door slams]" or "[music]." They are written for people who cannot hear the audio. The W3C Web Accessibility Initiative uses "captions" for text in the same language as the audio.
- Subtitles, in that same usage, are the spoken audio translated into another language, for viewers who can hear but do not know the language. In many regions, "subtitles" is used for both.
- Closed captions are stored separately from the picture, and the viewer can switch them on or off in the player.
- Open captions, also called burned-in text, are part of the picture itself and cannot be switched off.
- Automatic transcription is a way of producing the text. Software listens to the audio and generates the words and timing. It is a method, not a type of caption, and its output normally needs checking.
This guide uses "subtitles" in the everyday sense: timed lines that represent what is being said.
A manual caption layer is not automatic transcription
The Add Text to Video tool has a Caption preset. It gives a text layer a caption-style look: 42-point white text on a black box at 0.46 opacity, with a light shadow. It also replaces the layer's wording with the placeholder "Caption text," so apply it before you type. A text layer is a separate piece of text with its own wording, style, position, and start and end time.
Everything about that layer is manual. You type the words. You set when the line appears and disappears. The tool does not listen to the video, does not transcribe speech, and does not generate subtitle timing. It also does not import or export subtitle files. The result is burned-in text: once the video is processed, the words are part of the picture.
That makes a manual caption layer a good fit for one or two key lines, such as a short quote or a single sentence you want everyone to see. It is a poor fit for a whole conversation, where every sentence would need its own layer.

Comparison table
| Feature | Text overlay | Subtitles | Best use |
|---|---|---|---|
| Purpose | Design and emphasis | Representing spoken dialogue | Overlay for messages you invent; subtitles for words people say |
| Amount of text | A few short items | Many lines across the video | Subtitles once you pass a handful of lines |
| Link to the audio | None required | Each line is timed to speech | Subtitles for anything that must match speech closely |
| Styling | Individual for each item: font, color, box, rotation | One consistent style for all lines | Overlay when the look is part of the message |
| Position | Anywhere in the frame | Usually bottom center | Overlay for text next to a subject or an object |
| Time on screen | Seconds, chosen for emphasis | As long as the phrase is spoken | Depends on the role of the text |
| How the text is created | Typed by hand, layer by layer | Created or imported as a sequence of timed lines | Subtitle workflow for longer dialogue |
| Typical examples | Title, name label, step callout, call to action | Interview, vlog narration, tutorial voiceover | Often both in the same video |
When to use Add Text to Video
- You need a title, a name label, a step callout, a price, or a call to action.
- Each piece of text needs its own look or its own place in the frame.
- The text does not have to follow speech word for word.
- You want one or two key sentences shown as manual captions.
- The total is small enough to manage layer by layer. If the text follows most of the dialogue, use a subtitle workflow instead.
Workflow: design text with Add Text to Video
Use the tool to create a timed text layer for each message.
- Upload the video. MP4, MOV, AVI, WebM, MKV, and other common formats are accepted.
- Pick a Quick preset as a starting point: Title, Caption, or Label.
- Type the wording in the Text field.
- Style the layer: font and size, text color, outline (Border width and Border color), shadow, and background box.
- Drag it into position in the preview, and resize or rotate it with the handles if needed.
- Set Start and End for the layer.
- Add more layers. Type new wording and click Add text. Use the layer list under the player to go back to a layer with Edit or remove it with Delete.
- Preview the timeline, click Add text to video to process the file, and download the result.
When to use Add Subtitles to Video
- People talk through most of the video, and viewers should be able to follow without sound.
- You have many lines that must appear one after another in a consistent style.
- You already have the dialogue as a script or as timed lines.
- Accuracy against the speech matters more than individual design.
Add Subtitles to Video is built for that job: working with longer sequences of timed dialogue or caption lines, not with individually designed layers. On the site, you create the lines by hand or upload an SRT file, which is a common plain-text subtitle format that stores each line with its start and end time. Creating every sentence as a separate design layer in Add Text would take far longer and would be harder to keep consistent.
Workflow: dialogue with a subtitle tool
- Prepare the text of what is said, in order.
- Open Add Subtitles to Video and upload the video.
- Create the lines by hand, or upload an SRT file if you already have one, and check each line's timing against the speech.
- Read every line once against the audio. Names, numbers, and technical terms are where errors hide.
- Keep lines short, one or two per screen, and keep the style consistent.
- Process the video and review the result with the sound off.
When to combine both in the full editor
Many videos need both kinds of text. An interview needs a title, a name label for each speaker, and subtitles for the conversation. A tutorial needs step callouts and subtitles for the narration.
You can do this in two passes with the standalone tools, but each pass processes the video again, and the second tool cannot move text that the first one has already burned into the picture. In the full Deus.Video editor, text and subtitles live in one project alongside clips, audio, and transitions, so you can see both at once and adjust them together before a single export.
When you combine them, protect the subtitle area. Keep titles, labels, and callouts out of the bottom part of the frame. If a label has to sit low, time it for a pause in the speech.

A quick decision path
- Does the text repeat what someone says, for most of the video? Use a subtitle workflow.
- Is it a message you wrote for emphasis, with its own look and place? Use a text overlay.
- Is it one or two spoken lines you want to highlight? A manual caption layer in Add Text is enough.
- Do you need both, or animation, or changes to clips and audio? Use the full editor.
- Is it a logo or a designed graphic, not editable words? That is an image. Use Add Image to Video.
A note on accessibility
Design text does not make a video accessible to viewers who cannot hear it. A title and three callouts do not tell them what was said. Captions do that, and for accessibility purposes they should cover the speech and the important non-speech sounds. If accessibility is a goal or a requirement for your project, plan a proper caption workflow and check the requirements that apply to you. A few text overlays are not a substitute.
Conclusion
Text overlays and subtitles solve different problems. Overlays are a small number of designed messages placed where they have the most effect. Subtitles are a long sequence of consistent lines tied to speech. Choose by the role of the words, use the tool built for that role, and move to the full editor when one video needs both.
Need a title, a label, or a callout? You can add text to a video online with Deus.Video, style each layer by hand, and set exactly when it appears.
Frequently asked questions
Does Add Text to Video generate captions automatically?
No. The tool does not transcribe speech or create subtitle timing. You type each line and set its start and end time yourself. The Caption preset only changes the look of a layer.
Can I use text layers as subtitles for a whole video?
You can for a few lines, but it does not scale. Every sentence needs its own layer with hand-set timing. For longer dialogue, use Add Subtitles to Video, which is built for sequences of timed lines.
What is the difference between subtitles and closed captions?
Closed captions are stored separately from the picture and can be switched on or off by the viewer. They normally include speech and important sounds. "Subtitles" often means translated dialogue, although many regions use the word for both. Text added with Add Text is neither: it is burned into the picture.
Can viewers turn off text added with this tool?
No. After processing, the text is part of the video image, like open captions. Keep your original video file, so you can produce a version without the text later.
Can I import an SRT file into Add Text to Video?
No. Add Text does not import or export subtitle files. Add Subtitles to Video accepts SRT uploads, so use that tool when you already have a subtitle file.
Can a video have both overlays and subtitles?
Yes, and many do. Keep the two apart in the frame: subtitles at the bottom, design text elsewhere. The full editor lets you work on both in one project before exporting.


