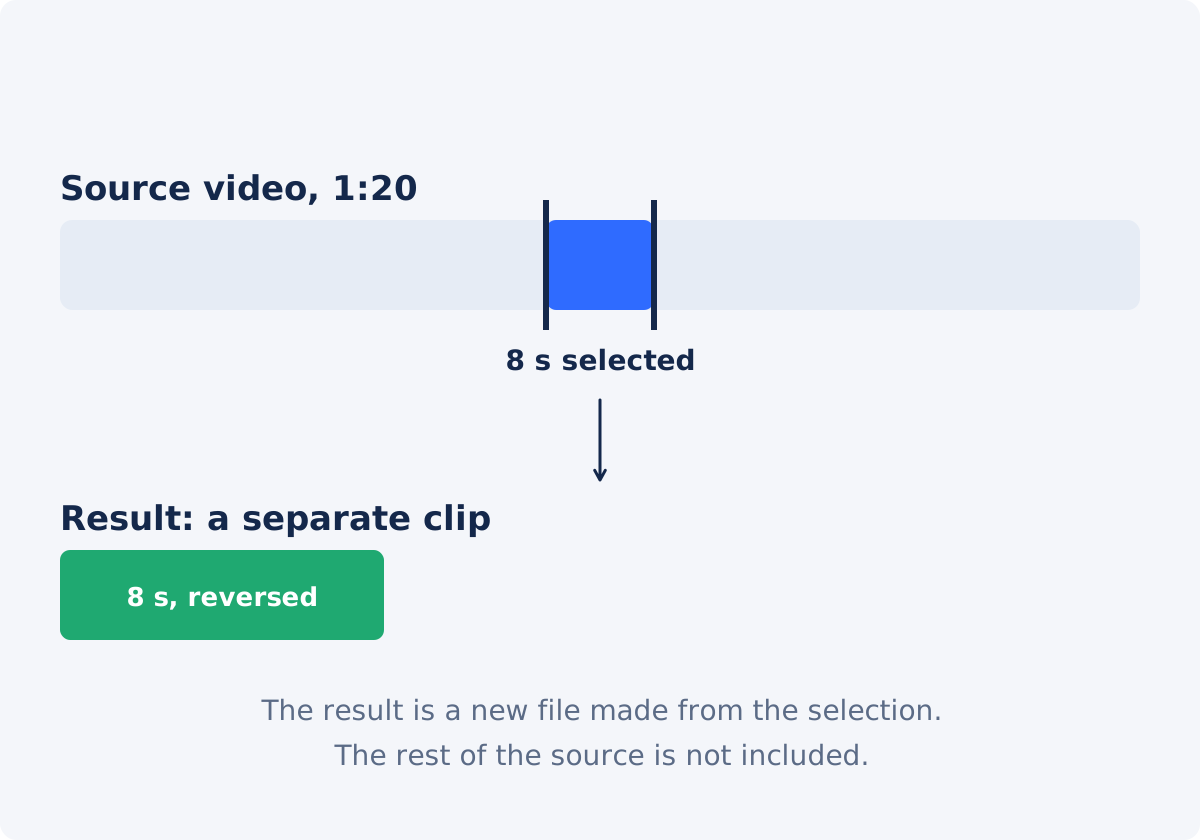
When a partial reverse is the better choice
Reversing, meaning storing the frames in the opposite order so the action runs backward, works on a moment, not on a whole recording. A ten-minute video played backward is a curiosity for a few seconds and then a chore. The interesting part is usually one action: the jump, the pour, the moment the tower falls.
- The recording is longer than the action. Setup, waiting, and the aftermath do not need to run backward.
- The reversed moment will sit inside a normal sequence. You need a short reversed clip to place between forward clips.
- The source is over 60 seconds. The tool processes up to 60 seconds per selection in any case.
- You want a small, quick file to share, loop, or turn into a GIF.
Reverse the whole file only when the file already is the action, for example a five-second clip trimmed earlier.
Finding the exact start and end of the action
Watch the source in the player and note two moments: the last still moment before the action, and the first still moment after it. Those are your endpoints. A few habits make this quicker.
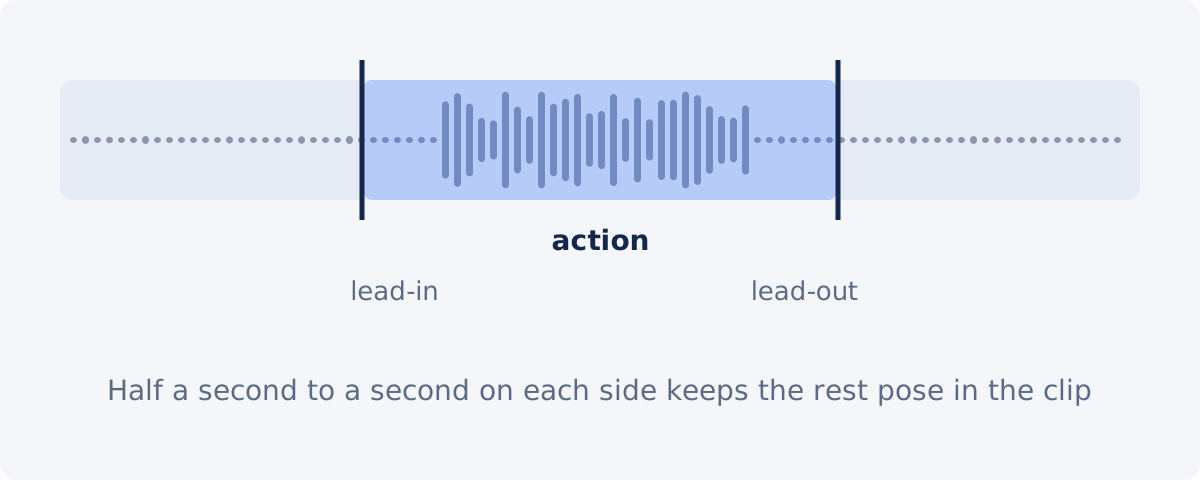
- Look for rest poses. A hand on the table before the throw, the glass standing full after the pour is reversed. Rest poses make the clip cut cleanly into other footage.
- Use the timeline slider to scrub. Drag the playhead slowly across the action and read the time display.
- Write the times down in the tool's format, minutes:seconds.hundredths, such as 0:12.40.
- Note the duration. If the action is 4 seconds, the selection should be a bit longer than that, not shorter.
Presets, timeline handles, and manual timestamps
The tool offers three ways to define the selected range, meaning the part of the video that will be processed. They work together, and the Start and End fields always show the current values.
Quick presets
The buttons 3 sec, 5 sec, 10 sec, 15 sec, 30 sec, and 60 sec set the length of the selection in one click. They are the fastest way to get a range of a known size, which you then slide to the right moment.
Timeline handles
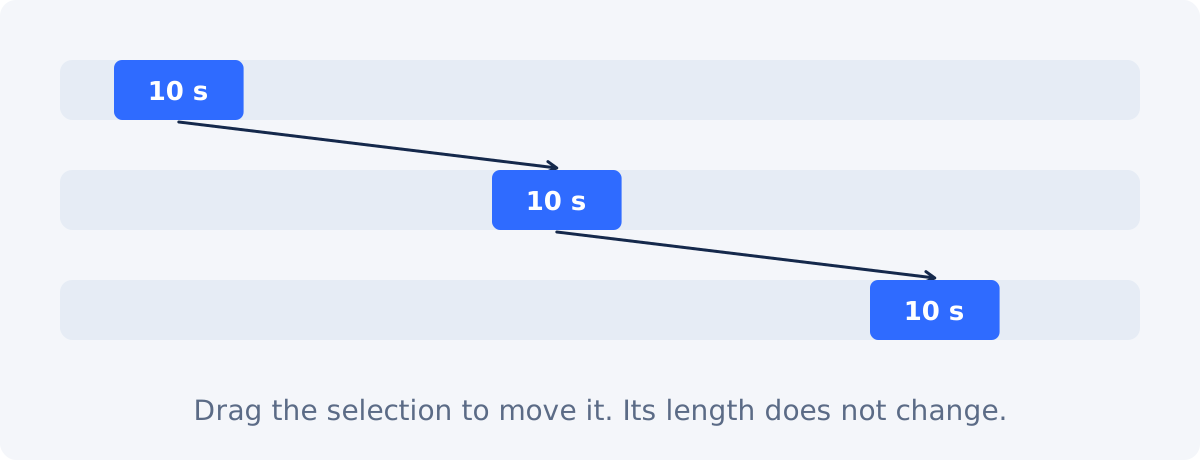
Under the player, the selected range appears as a highlighted bar with a handle at each end. Drag a handle to move one endpoint while you watch the picture. Drag the middle of the bar to move the whole selection without changing its length.
Manual timestamps
Type exact values into Start and End. This is the precise method, and the right one for a range you have already worked out by scrubbing. The line under the fields shows the resulting length against the 60-second maximum, for example "Selected: 0:05.00 of 1:00 maximum."
| Selection method | Best for | Precision |
|---|---|---|
| Quick presets (3–60 sec) | Setting a length quickly, then sliding it into place | Length exact; position set by dragging |
| Timeline handles | Adjusting an endpoint by eye while watching the picture | Depends on the timeline's zoom; fine for most clips |
| Dragging the whole selection | Moving a fixed-length range along a long video | Keeps the length; position by eye |
| Manual Start and End | Exact endpoints you have already identified | Hundredths of a second |

Moving the selection along a long video
With a long recording, set the length first and the position second. Click a preset that is slightly longer than the action, then drag the bar along the timeline until it sits over the moment you want. Press Play to check, and nudge the Start value by a few tenths of a second if the action begins too early or too late. The End value follows when you drag the whole bar, so the length stays what the preset set.
Why a little padding helps
A selection that starts exactly when the action starts produces a reversed clip that ends exactly when the action ends, in mid-motion. Placed next to other footage, that mid-motion edge looks like a cut in the wrong place.
Leave a small margin on both sides: half a second to a second of the rest pose before the action, and the same after it. In the reversed clip, that margin becomes a still moment at the beginning and the end, which gives the viewer a beat to register what is happening and gives you a clean point to cut on. If the margin turns out to be too long, it is easy to trim from the finished clip; a margin that was never recorded cannot be added.
Step-by-step in Deus.Video
With the tool, you can make the selected clip play backwards without touching the rest of the recording.
- Upload the full source video. There is no need to trim it first. Common inputs include MP4, MOV, AVI, WebM, and MKV.
- Find the action by scrubbing, and note where it starts and ends.
- Click a preset a little longer than the action, or drag the handles to a rough range.
- Drag the selection so the action, with its margins, sits inside it.
- Refine Start and End by typing exact values if needed. Confirm the selection line shows a length of 60 seconds or less.
- Press Play. The preview shows the selected range forward; check that the action is complete and the margins are there.
- Set Reverse audio on or off.
- Click Reverse video, and download the processed clip, or continue in the full editor.
The result is a new file containing only the selection, played backward. The source video is unchanged.
Common mistakes
- Reversing the wrong seconds. A preset was clicked and the bar was never moved, so the clip starts at 0:00. Always press Play before processing.
- A range over 60 seconds. The limit applies to one selection. Shorten the range, or reverse the material in two selections and join them later.
- Cutting off the motion. The selection starts after the action began or ends before it finished. Add margins, and check the first and last frames in the preview.
- Expecting the result inside the original. The download is the reversed selection on its own. Building the before-and-after sequence is a separate step.
- Judging the reversed result from the preview. The preview is the original range, forward. Play the download.
- Re-processing a processed file. To change the range, go back to the source.
When you need the full editor
The standalone tool produces the reversed fragment. To place it back where it came from, so the video plays forward, then backward for a moment, then forward again, use the full Deus.Video editor: add the original clip, split it at the action, insert the reversed result between the two parts, and trim the edges so the motion meets cleanly. The editor is also where you add a sound effect over the reversed section, keep music running across it, or put text on top. For simply putting the original and the reversed clip one after another, Merge Videos is enough.
Conclusion
Reversing part of a video is mostly a question of selecting well: find the rest poses on either side of the action, set the length with a preset, slide the range into place, and confirm it in the forward preview. Keep the selection under 60 seconds, leave a small margin at each end, and remember that the result is the reversed fragment by itself, ready to be placed wherever the sequence needs it.
Found the moment? Create a reversed video clip from that selection, and build the rest of the sequence around it.
Frequently asked questions
Do I have to trim the video before reversing part of it?
No. Upload the whole recording and select the range inside the tool; only the selection is processed. Trimming first is useful only if you want the short forward clip as a separate file as well, for example to pair with the reversed one later.
How precisely can I set the start and end?
The Start and End fields accept minutes, seconds, and hundredths, such as 0:12.40. Presets set the length, handles set endpoints by eye, and typed values give the finest control.
Can the selected range be longer than 60 seconds?
No. One processed selection is limited to 60 seconds. Reverse longer material in several selections and join them in an editor.
Does the tool put the reversed part back into the original video?
No. It creates a separate clip from the selection. To combine normal and reversed sections, assemble them in the full editor or place the files one after another with Merge Videos.
Can I reverse two different parts in one go?
No. Each run reverses one selected range. Process each part separately from the same source file, download each result, and combine them afterward in the full editor or with Merge Videos.
Why does my reversed clip stop in the middle of the movement?
The selection ended before the action finished, or started after it began. Reselect with half a second to a second of stillness on both sides of the motion, and process again.


