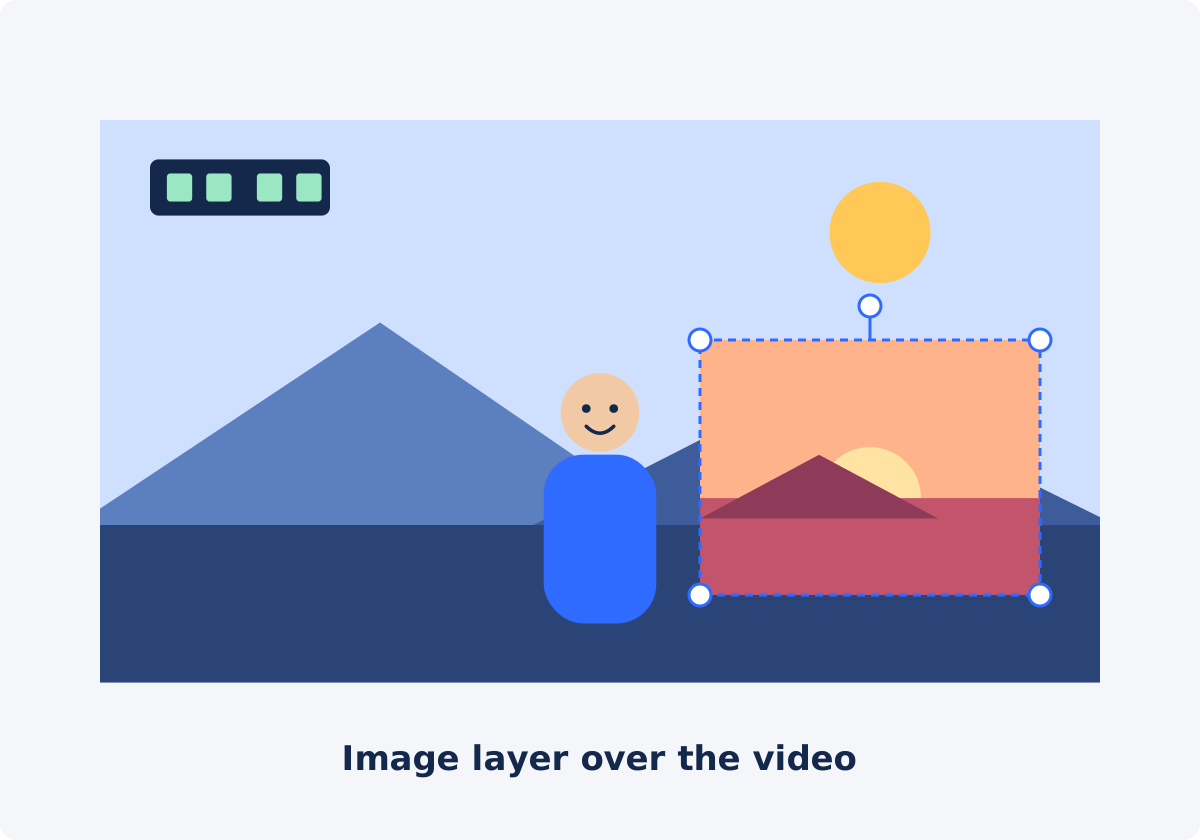
What an image overlay is
An overlay is a still image displayed over the video picture. The video keeps playing underneath, and the image covers part of the frame while it is visible. Each overlay is a layer, which means a separate item with its own settings that can be edited without affecting the others.
Two things define a layer. The first is where it sits in the frame and how large it is. The second is when it is visible on the timeline, which is the time axis of the video. A layer appears at its start time and disappears at its end time.
Common types of picture overlay
Photo
A photo shows something the video mentions but does not contain: a person being discussed, a location, an archive picture. It usually appears for a few seconds beside the speaker.
Product image
A clean product shot appears while the product is described. A transparent PNG cutout blends into the scene. A rectangular JPG looks like a card placed over the video.
Before-and-after reference
You can show the "before" state as a still image while the video shows the "after," or place two images side by side over a neutral part of the frame. Give both the same size and the same vertical position, so the comparison feels fair.
Static image in a picture-in-picture style
A small rectangular image in a corner resembles a picture-in-picture layout. It is worth being precise here: real picture-in-picture plays a second video inside the first. An image layer is a still. It does not play, move, or carry sound. If you need a second moving video, that is a task for the full Deus.Video editor.
How to overlay pictures with multiple layers
The Add Image to Video tool lets you create a timed image overlay, or several of them, on a single video.
- Upload the video. MP4, MOV, AVI, WebM, MKV, and other common formats are accepted.
- Click Add image and choose the first picture. It appears in the preview, and an entry with the file name and time range appears in the layer list under the player.
- Pick a starting placement. The Quick presets are Logo, Sticker, and Center. Use one as a starting point, or skip this step and place the layer by hand.
- Move and resize the layer. Drag it in the preview and use the corner handles, or type X, Y, Width, and Height.
- Set Start and End for this layer.
- Add the next picture with Add image and repeat the steps. To go back to an earlier layer, use Edit in the layer list. Use Delete to remove a layer.
- Play the preview from the first layer to the last.
- Click Add images to video, then download the processed result.

Position, dimensions, rotation, and timing
Position
X and Y set where the layer sits in the frame. Dragging in the preview changes the same values. Typed values are useful when two images must line up, for example two product shots at the same height.
Dimensions
Width and Height set the displayed size of the layer. The values relate to the scale of the preview, so judge size by how the image looks against the video, not by comparing the numbers with the pixel dimensions of your source file.
Rotation
Rotation accepts values from -180° to 180°, and the preview has a rotation handle. A small tilt of 3–8 degrees can make a photo feel casual, like a print on a table. Keep screenshots, charts, and anything with text at 0, because tilted text is harder to read.
Timing
Start and End control when the layer is visible. Give viewers enough time: a simple photo needs at least two to three seconds to register, and an image with detail needs longer. Layers appear and disappear as a cut. The standalone tool has no fades or motion for image layers.
Aspect ratio and the risk of stretching
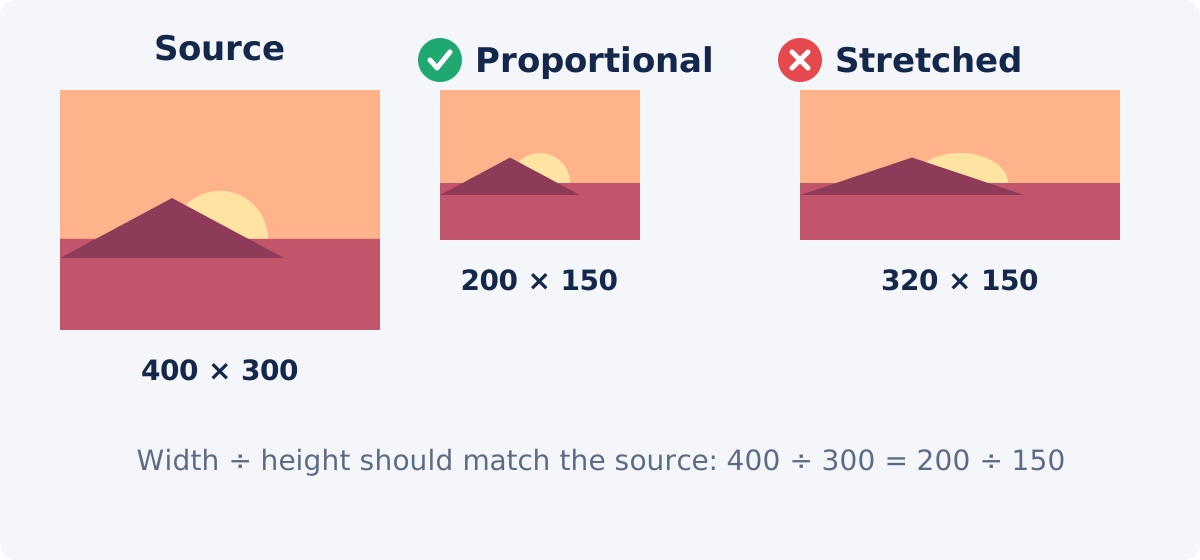
Aspect ratio is the relationship between the width and height of an image. A 1200 × 800 photo has a ratio of 3:2. If the layer is displayed at 300 × 200, the photo looks natural. At 300 × 150, everything in it looks squashed.
In this tool, Width and Height are independent, and the aspect ratio is not locked. The panel reminds you of this under the size fields. To resize without distortion:
- Find the source size of the image, for example 1200 × 800.
- Divide width by height to get the ratio: 1200 ÷ 800 = 1.5.
- Choose the width you want, such as 270.
- Divide it by the ratio to get the height: 270 ÷ 1.5 = 180.
- Type both values.
When you drag a corner handle, watch a round object or a face in the image. If it starts to look like an oval, retype the numbers. The tool does not crop images either. If you need only part of a photo, crop it in an image editor before uploading.
How to avoid covering the subject or captions
An overlay always hides something. The aim is to hide something that does not matter.
- Find the calm areas. Walls, sky, tabletops, and out-of-focus backgrounds are good places. Faces, hands, products, and on-screen text are not.
- Check the whole time range. People move. A position that is clear at the start may cover the speaker's gesture five seconds later.
- Keep clear of captions. If the video has subtitles, or will get them later with Add Subtitles, keep the lower part of the frame free.
- Respect the direction of the look. If the speaker faces right, put the image on the right. It then looks like the person is referring to it.
- Do not fill the frame by accident. An overlay larger than about a third of the frame starts to compete with the video. If the image should take over completely, make that a deliberate full-frame moment.
If the image needs a label, such as a name or a price, add it as editable text with Add Text to Video. Text baked into a picture cannot be corrected later.
Placement guide by purpose
| Overlay purpose | Placement | Size | Timing consideration |
|---|---|---|---|
| Photo of a person or place being mentioned | Beside the speaker, on the side they face | About a quarter to a third of the frame width | Appear as the name is spoken; stay 3–5 seconds |
| Product image | Calm area near the presenter, clear of hands | Large enough to recognize the product on a phone | Visible for the whole description of that product |
| Before-and-after reference | Two images at equal height, or one image beside the live result | Both images the same size | Long enough for the eye to compare both sides |
| Picture-in-picture-style still | A corner with equal margins | Small, around a fifth to a quarter of the frame width | Can stay for a whole section |
| Icon, arrow, or sticker | Next to the thing it points at, not on top of it | Small | Only while the point is being made |
| Full-frame image moment | Centered, covering the frame | Matches the frame | Short, and placed where the underlying video is not needed |
When layers overlap
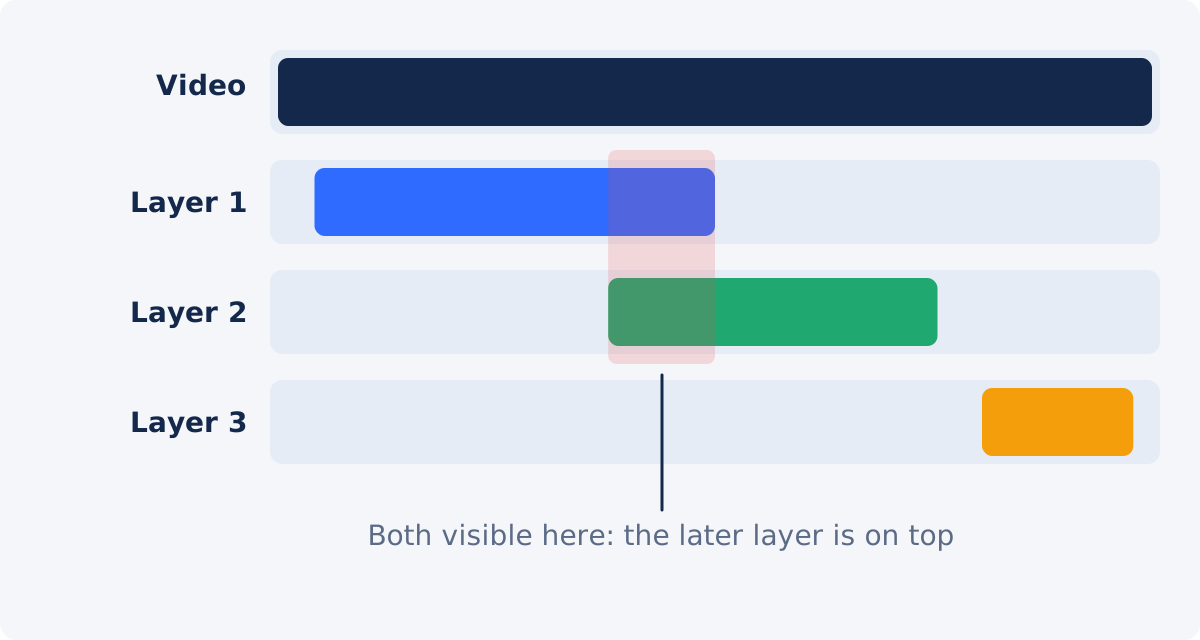
Several layers can be visible at once. If two of them also share the same area of the frame, one covers the other. In this tool, later layers may cover earlier ones, so the order in which you add images matters.
- Plan the order. Add background-style images first and images that must stay on top last.
- Separate layers in time or space. If two images do not need to be seen together, end the first before the second starts, or place them in different parts of the frame.
- Check every handover. Scrub through the moments where one layer ends and another begins. A one-second overlap you did not intend is easy to miss.
- Rebuild if the order is wrong. Delete the layer that should be on top and add it again, so it becomes the latest layer.
Review the export
The preview shows position and timing while you work. The processed file is what viewers get, so check it before publishing.
- Watch every layer appear and disappear at the right moment.
- Look at faces and round objects in your images for stretching.
- Check the edges of transparent images against the footage behind them.
- Confirm that captions, faces, and key actions stay visible.
- View the file on a phone. Small overlays that look fine on a monitor can be unreadable there.
When you need more than a static overlay
The standalone tool places still images with fixed position, size, and rotation. The full Deus.Video editor goes further. Image elements there have crop and opacity controls, their properties can be animated with keyframes, and images can be combined with clips, audio, text, and transitions on one timeline. After processing a video in the standalone tool, you can continue editing the result in the full editor.

Conclusion
A picture overlay works when it supports the video without fighting it. Choose a calm area of the frame, keep the image's proportions, give it enough time on screen, and check the places where layers meet. Then watch the processed file from start to finish.
Ready to try it? You can add an image to a video online with Deus.Video, position each layer, and set when it appears before you download the result.
Frequently asked questions
Can I put more than one picture on the same video?
Yes. Each picture becomes a separate layer with its own position, size, rotation, and start and end time. You can select a layer again with Edit in the layer list, or remove it with Delete.
Why does my picture look stretched?
Width and Height are set independently, and the tool does not lock the aspect ratio. Divide the source width by the source height, and make sure the layer's width divided by its height gives the same number.
Can I make the picture fade in or move across the screen?
Not in the standalone tool. Layers appear and disappear at their start and end times and stay in one place. For fades, motion, or keyframe animation, use the full editor.
Can I crop the picture inside the tool?
No. Crop the image in a photo editor before you upload it. The tool lets you change the displayed size, position, and rotation of the whole image.
Is an image overlay the same as picture-in-picture?
It looks similar, but it is not the same. Picture-in-picture plays a second video in a small window. An image layer is a still picture. For a second moving video, use the full editor.
Which image formats can I use?
The image picker accepts browser-supported image files, including common PNG and JPG images. PNG is useful when you need a transparent background. Support can depend on how a particular file is encoded, so check the preview and the processed result.


