What decides the quality
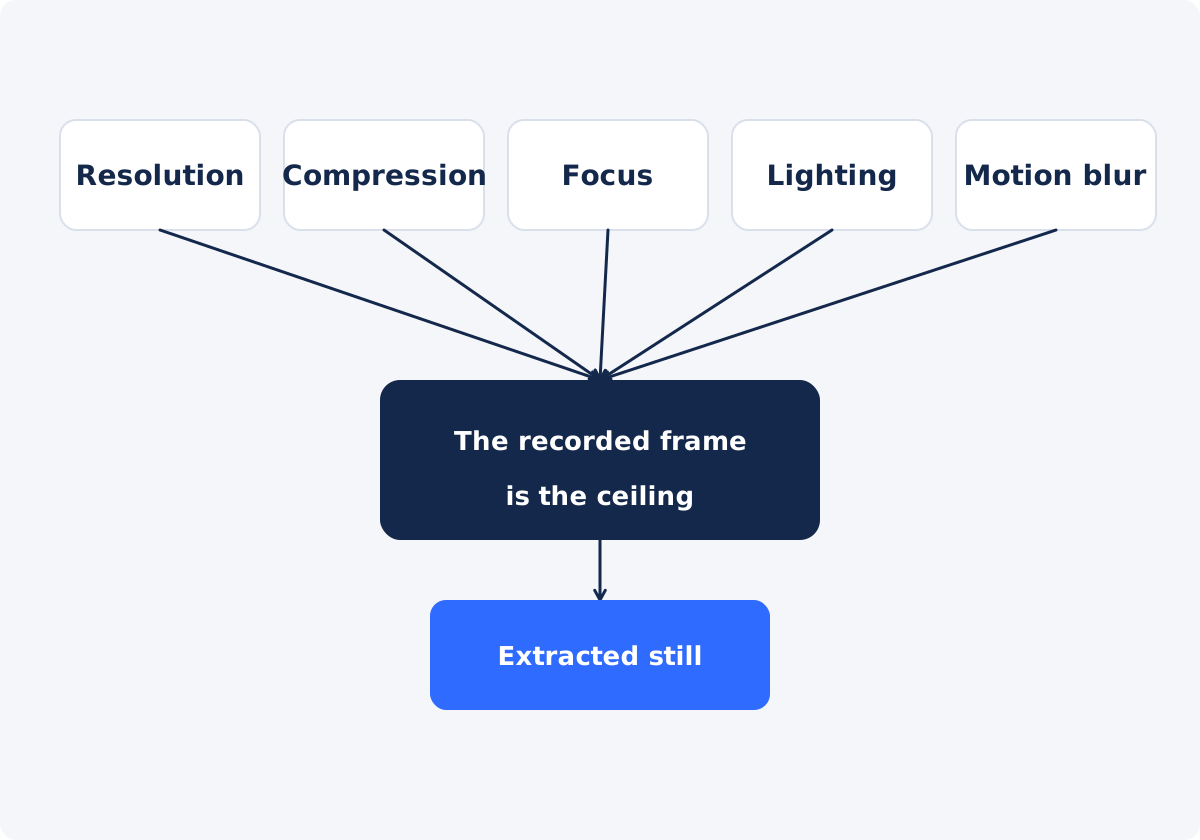
Think of the recorded frame as the ceiling. Five things set where it is.
- Resolution. The image has the frame's dimensions: 1920 × 1080 from a 1080p video, 3840 × 2160 from 4K, 640 × 360 from a small file. More pixels can hold more detail, if the other factors allowed the camera to record it.
- Bitrate and compression. Video compression discards detail on purpose, and it discards more when the bitrate is low. Frames from a phone's original recording keep much more than frames from the same video after a messenger or a social platform has re-encoded it. Compression damage shows as blockiness, smeared textures, and bands in gradients.
- Focus. A frame that is soft because the lens was focused elsewhere stays soft.
- Lighting. Dark frames carry noise and lose color; blown-out highlights lose everything in them.
- Motion blur. Movement during the exposure of a frame smears it. Blur varies frame to frame, which is the one factor you can work around by choosing a different frame.
Everything below follows from this list: find the copy with the most detail, then find the frame with the least damage.
Start from the best copy of the video
If you recorded the video, the file on the camera or phone is the least compressed version. Every export, upload, and download after that tends to reduce it. If the video came from someone else, ask for the original file rather than a link to a platform, and avoid copies that came through chat apps, which compress aggressively. A larger file at the same resolution and duration is usually the less compressed one.
Choose a neighboring frame with better sharpness
Within one second of video there are typically 24 to 60 frames, and they are not equally sharp. Motion blur changes with the speed of the subject at each moment, and compression treats some frames more gently than others. The frame you want is often one or two frames away from the one you first paused on.
- Look for still points: the end of a movement, the top of a jump, a held pose.
- Step through in a player with frame-by-frame keys to find the cleanest one, and note the second it falls in.
- Extract the whole second. In Deus.Video, set Selected time range from that second to the next, for example 00:00:41 to 00:00:42, and every frame in that second is written to the ZIP. Open them and keep the sharpest. At 30 frames per second that is about 30 images, which is easy to compare.

When PNG helps, and when it does not
PNG is lossless: the decoded frame is stored exactly, with no further compression damage. JPG is lossy: it adds a small amount of its own compression, mostly around sharp edges. For a frame you will edit, print, or place on a slide, PNG is the safer choice because it does not add a second round of loss on top of the video's own.
What PNG does not do is recover anything the video already lost. If the frame is soft, noisy, or blocky in the video, the PNG is a faithful copy of a soft, noisy, blocky frame, only in a larger file. Choosing PNG over JPG is about not making the image worse, not about making it better.

Extracting the frame in Deus.Video
With the tool, you can save video frames as JPG or PNG from a timestamp or a short range.
- Upload the best copy of the video. MP4, MOV, AVI, WebM, and MKV are the common inputs; processing depends on the codec inside the file.
- Choose PNG as the Output format for a frame you will edit or present, or JPG for a photographic frame where a small file matters.
- Set Extraction mode. Specific timestamp for one frame at hh:mm:ss, or Selected time range to get every frame in a short window and compare them.
- Enter the time or times as hh:mm:ss.
- Click Convert to Photos and wait.
- Inspect the preview, click it to see the frame larger, and download the ZIP.
- Compare candidates at 100% zoom on your computer, not in a thumbnail view, and keep the sharpest.
The tool writes the frame as decoded, at the video's dimensions. It has no upscale, sharpen, crop, or color settings.

Why a screenshot is not always the same as an extracted frame
A screenshot of a video player captures the screen, and three things get in the way.
- Scaling. The player fits the video to the window, so a 1080p video shown in a 900-pixel-wide window is captured at 900 pixels, and a small video shown full screen is captured enlarged and soft.
- Interface. Controls, a progress bar, a cursor, or a caption overlay can be in the capture.
- Timing. Some players show a blended or interpolated image while paused, or land on a frame near, not at, the moment you wanted.
Extraction reads the frame from the file at its native size with none of that. When the video is small and the screen is large, the difference is dramatic; when the video is larger than the screen, a screenshot throws detail away.

Preparing a frame for a thumbnail or a presentation
Once you have the best frame the video can give, a little preparation makes it useful.
- Crop for the format. A thumbnail is usually 16:9 and a slide image may be anything; crop in an image editor to the shape you need, keeping the subject off the edges.
- Do not enlarge. If the frame is smaller than the space, let the platform scale it, or use it smaller. Enlarging adds softness and no detail.
- Adjust brightness and contrast gently in an image editor if the frame is a little dark. Large corrections amplify noise and compression artifacts.
- Add text after extraction, in an image editor, rather than extracting a frame that already has burned-in captions.
- Keep the PNG as the master and export a JPG for the web from it.
If the frame is going back into a video, for example as a freeze-frame or a title background, the extracted PNG can be placed on the timeline with Add Image to Video.
| Source issue | Visible symptom | Can extraction fix it? | Best next step |
|---|---|---|---|
| Low resolution | Small image, soft when enlarged | No | Find a higher-resolution copy; use the image at its size |
| Heavy compression | Blocks, smeared textures, banded sky | No | Find the original file; avoid re-downloaded copies |
| Motion blur | Smeared subject or background | Partly: choose another frame | Extract the whole second and pick the sharpest |
| Soft focus | Everything slightly blurred | No | Look for a moment where focus settled |
| Dark or noisy frame | Grain, muddy color | No | Choose a brighter moment; small correction in an image editor |
| Interlaced source | Comb-like lines on moving edges | No | Choose a frame with less motion; deinterlace in a video converter first |
| Player screenshot used instead | Scaled image, UI elements | Yes: extract instead | Extract the frame from the file |
Conclusion
A high-quality still comes from a high-quality source frame. Use the least compressed copy of the video, find the sharpest frame within the second you want, extract it as PNG if you will work on it or JPG if it is going straight to the web, and resist enlarging. Extraction is faithful; it delivers exactly what the video holds.
Have the best copy of the video? Extract a frame from a video with the Convert Video to Photo tool, compare a few neighbors from a short range, and keep the sharpest one.
Frequently asked questions
Can the tool make a still sharper than the video?
No. It writes the frame as stored in the video. Sharpness, resolution, noise, and compression damage are all inherited from the source. What you can do is choose the sharpest frame and the least compressed copy of the video.
Does PNG give a better image than JPG?
PNG avoids adding a second round of compression, so it is a faithful copy of the frame. It does not improve the frame. For photographic content, the difference from a JPG is usually invisible; for text and edges, PNG is cleaner.
How do I find the sharpest frame in a second?
Use Selected time range with a one-second window, for example 00:00:41 to 00:00:42. Every frame in that second is written to the ZIP, and you can compare them at full size and keep the best.
Why is a screenshot worse than an extracted frame?
A screenshot captures the player as shown on screen, scaled to the window and sometimes with controls in the picture. Extraction takes the frame from the file at its native resolution with nothing added.
Can I get a 4K image from a 1080p video?
Not with real detail. The frame has 1920 × 1080 pixels, and enlarging it only spreads them. Use the image at its native size, or find a 4K source.
What is the best format for a thumbnail?
Extract as PNG, crop and adjust in an image editor, then export a JPG for the platform. Keeping the PNG as the master lets you re-export without stacking compression.


