Extraction vs. transcription
The two are often mentioned together, so it is worth separating them.
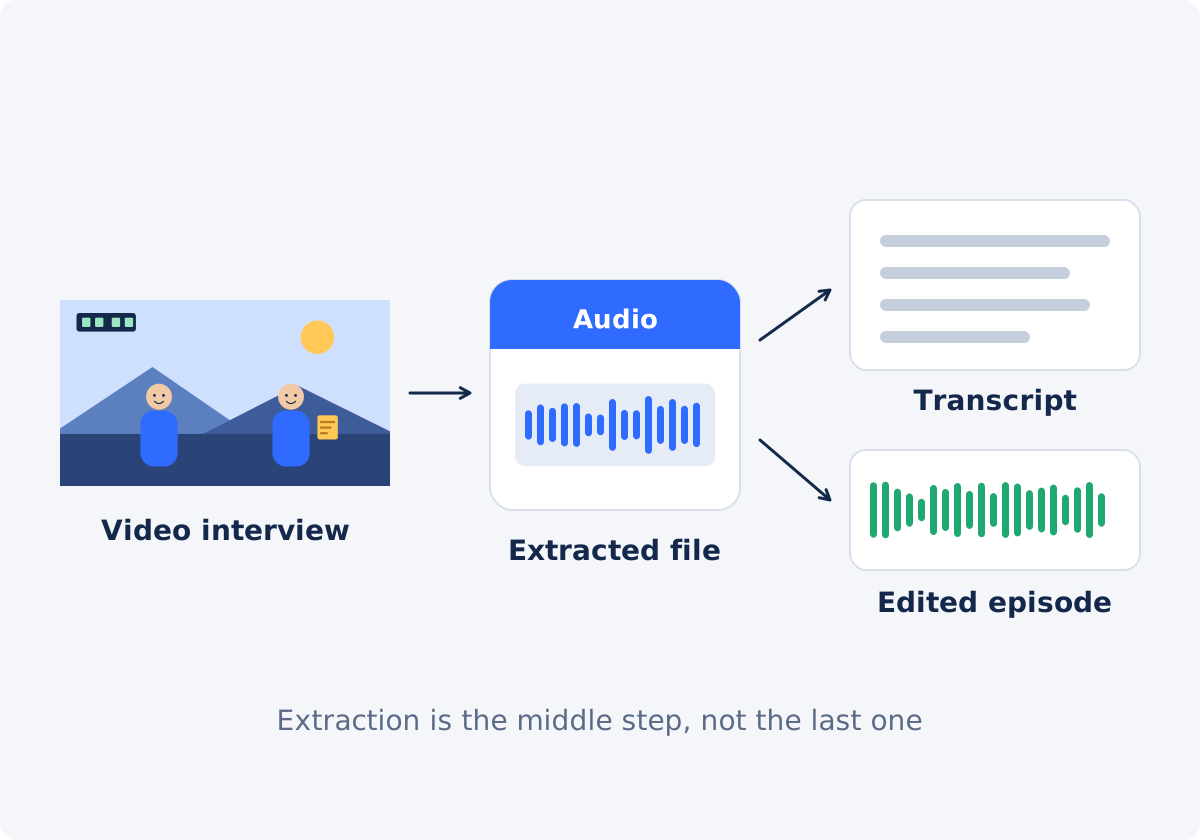
Extraction creates an audio file from the soundtrack of a video. The soundtrack is the audio stored inside the video file. The output is sound: MP3 or WAV.
Transcription turns speech into written text. The output is words, often with timestamps and speaker labels. It is done by transcription software, a transcription service, or a person typing.
The Extract Audio tool does the first and not the second. It is a preparation step. People extract audio before transcribing for good reasons: audio files are far smaller than video, they upload faster, many services set limits on file size or accept only audio, and you may not want to share the picture at all.
MP3 or WAV for what comes next?
- For transcription, MP3 is usually the practical choice. Speech survives MP3 compression well, the files are small, and virtually every service accepts them. Check your service's list of accepted formats and its size limit before uploading.
- For editing, choose WAV. A podcast edit involves cutting, leveling, cleaning, and exporting again. WAV does not add another round of lossy compression at the extraction step, and audio editors work with it natively. Expect large files, roughly 10 MB per minute for stereo.
- For both, extract twice. Take an MP3 for the transcript and a WAV for the edit, each directly from the original video. Do not convert one into the other.
Neither format improves the recording. If the video's soundtrack was already compressed or poorly recorded, the WAV is a large copy of that same sound. The tool has no bitrate or sample-rate settings.
The complete interview or a selected section?
Take the complete soundtrack when you need a full transcript, when you will edit the whole conversation into an episode, or when you have not yet decided which parts matter. Cutting is easier once you have the text in front of you.
Take a selected time range when you already know what you need: one answer for a quote, a ten-minute segment for a clip, or a two-minute sample to test how well a transcription service handles the speakers' accents and the room. Ranges are entered as start and end timestamps in hh:mm:ss, the end has to be later than the start, and both have to fall inside the video's length. Leave a second or two of margin on each side, so no word is clipped.
How to extract the audio in Deus.Video
Use the tool to save the soundtrack as MP3 or WAV from your interview or recording.
- Start from the best source. Use the original recording, not a copy that was compressed again by a messenger or a video platform.
- Upload one video file. Common inputs include MP4, MOV, AVI, WebM, and MKV.
- Choose the Output format: MP3 for transcription and listening, WAV for editing.
- Choose the Extraction mode: Complete soundtrack, or Selected time range with Timestamp from and Timestamp to.
- Click Extract audio from video and wait for processing to finish.
- Preview the processed audio in the player on the page, using the review points in the next section.
- Click Download result, and name the file clearly, for example "2026-09-interview-maria-full.mp3."
- Hand it to the next tool in your workflow.

Review the audio before you send it on
Automatic transcription is only as good as the audio it hears, and an editor can only fix so much. Five minutes of listening now can save an hour of correcting later.
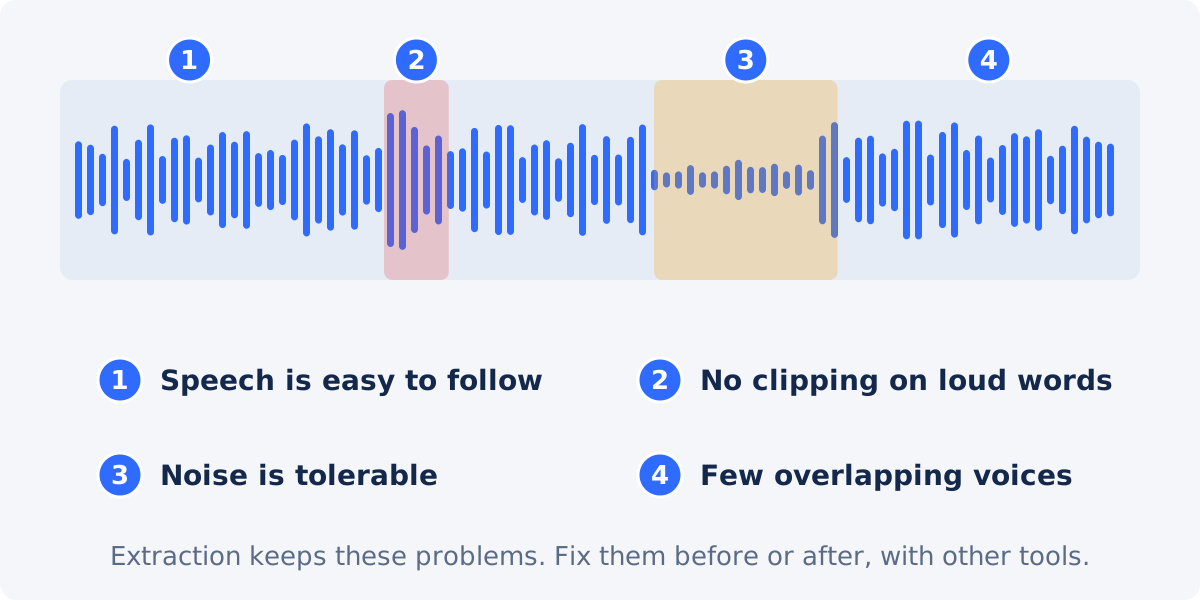
- Speech intelligibility. Can you follow every sentence without effort? Mumbled passages, heavy echo, and speakers who are far from the microphone will produce errors in a transcript. Note the times of the difficult spots, so you can proofread them closely.
- Clipping. Clipping is harsh, crackling distortion that occurs when the recording level was too high and the loudest peaks were cut off. It typically appears on laughter, emphasis, and plosive sounds. It cannot be fully repaired. If it is widespread, look for a better source recording.
- Background noise. Air conditioning, traffic, café chatter, keyboard sounds. Steady noise is easier for cleanup tools and transcription engines to cope with than intermittent noise that overlaps speech.
- Speakers. Are all voices at a usable level, or is one person much quieter? Do people talk over each other often? Overlapping speech is the hardest thing for automatic transcription and speaker labeling.
- Completeness. Does the duration match the video? Is the beginning or the end missing?

Extraction does not denoise or isolate voices
The extracted file is the soundtrack as it is, with everything mixed together: voices, room sound, music, noise. The tool does not reduce noise, enhance speech, remove music, or separate one speaker from another. Those are different kinds of processing, called noise reduction and audio isolation, and they need dedicated software.
This matters for planning. If the recording is noisy, extraction will not rescue it. Decide whether a cleanup step belongs in your workflow before transcription, and use WAV as the input for that step.
Next steps after extraction
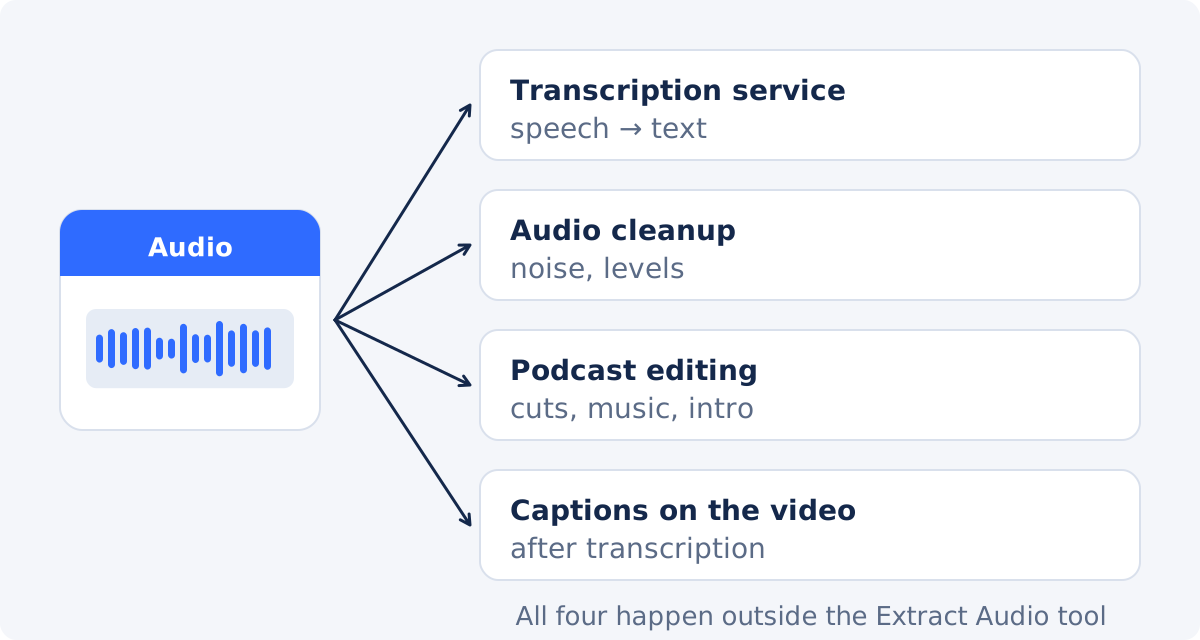
Transcription
Upload the audio to the transcription service or software of your choice. Provide names and unusual terms if the service allows it, and always proofread names, numbers, and technical vocabulary.
Cleanup
In an audio editor, reduce steady noise, even out the volume between speakers, and tame harsh peaks. Work on the WAV and keep the untouched extraction as a backup.
Editing
Cut false starts and digressions, tighten pauses, and add an intro, music, and an outro. Export the finished episode in the format your podcast host asks for. Hosting and publishing happen on the podcast platform, not in the extraction tool.
Captions
If the goal is captions on the original video, the transcript is the raw material. Turn it into timed lines, then use Add Subtitles to Video, where you can create lines by hand or upload a subtitle file. For a project that combines clips, audio, text, and subtitles on one timeline, continue in the full Deus.Video editor.
What each next task needs
| Next task | Suggested output | Additional tool needed |
|---|---|---|
| Automatic transcription of an interview | MP3, complete soundtrack | Transcription service or software |
| Human transcription or note-taking | MP3 | Media player with speed control, text editor |
| Testing a transcription service | MP3, selected range of 1–2 minutes | The service's trial or free tier |
| Noise cleanup before transcription | WAV | Audio editor or noise-reduction software |
| Editing a podcast episode | WAV, complete soundtrack | Audio editor or digital audio workstation; podcast host for publishing |
| Pulling one quote for social media | MP3 or WAV, selected range with margin | Audio or video editor for the final piece |
| Captions on the original video | MP3 for the transcript | Transcription tool, then a subtitle tool or the full editor |
| Replacing or remixing the video's sound | WAV | Audio editor, then Add Audio to Video or the full editor |
Privacy and consent for recorded speech
An interview recording contains other people's voices, and often personal or confidential information. Handling it carries responsibilities that a technical tool cannot take on for you.
- Consent. Make sure the people you recorded agreed to the recording and to how you plan to use it, including transcription and publication. Rules about recording conversations differ between countries and states.
- Third-party services. Uploading audio to a transcription or editing service means sharing it with that provider. Read how the service stores, uses, and deletes files, especially for sensitive material such as medical, legal, HR, or research interviews.
- Minimize. If only one section is needed, extract only that range. Less material shared means less risk.
- Storage. Audio files are easy to forward and hard to recall. Store them as carefully as you would the video.
This is general guidance, not legal advice. For regulated or sensitive work, check the requirements that apply to you.
Conclusion
Extraction is the bridge between a video recording and the tools that work with sound. Choose MP3 for transcription and WAV for editing, take the whole recording or just the part you need, and review the speech, the peaks, the noise, and the speakers before passing the file on. Cleanup, transcription, editing, captions, and publishing all happen in other tools, and each of them works better with a recording you have already listened to.
Have an interview on video? Open the Extract Audio tool, pick the format for your next step, and preview the audio before you download it.
Frequently asked questions
Does the tool transcribe the audio?
No. It creates an audio file from the video's soundtrack. Turning speech into text requires a separate transcription service or software. Extracting the audio first gives that service a smaller file to work with, and it lets you keep the picture private.
Which format do transcription services prefer?
Most accept MP3, and many accept WAV as well. MP3 is usually more practical because of upload limits. Check your service's documentation for accepted formats and maximum file size.
Can the tool remove background noise or music from an interview?
No. The output is the soundtrack as recorded, with all sounds mixed together. Noise reduction and voice isolation need dedicated audio software.
Can it separate the two speakers into different files?
No. Speaker separation is not part of extraction, and the output contains all voices mixed together. Some transcription services label speakers in the text, and that happens on their side. It works more reliably when people do not talk over each other.
Should I extract the whole interview or only the parts I need?
If you need a full transcript, or have not yet chosen the parts, take the complete soundtrack. If you already know the section, a selected time range gives a smaller file and shares less material.
Can I publish the extracted audio as a podcast directly?
You can upload any audio file to a podcast host, but most episodes benefit from editing first. The tool does not edit, level, or publish audio. It gives you the file to work with.


