Hard upload limit or storage preference?
The first step is knowing which kind of target you have, because the two call for different strategies.
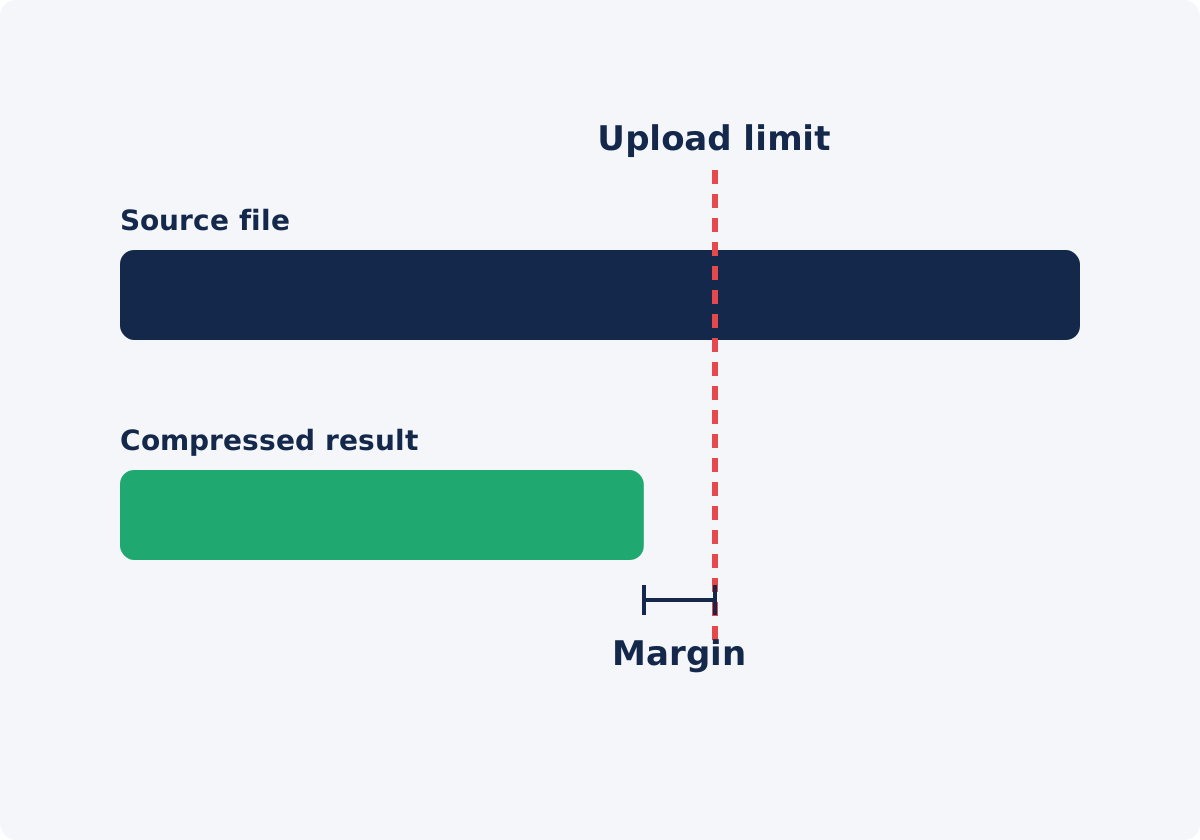
A hard limit is enforced by something else: an email server, a form, a learning platform, a messaging app. One byte over, and the upload fails. Here the target must be conservative, and the result has to be verified.
A soft target is your own preference: you would like the archive copy to be around 200 MB, or you want a lighter file for a slow connection. Nothing breaks if the result is 212 MB. Here you can let quality lead and treat the number as a rough guide.
If quality matters more than a number, a preset may serve you better than a target. Target size makes the most sense when there is a real ceiling to get under.
Why the output may differ slightly from the target
Target size is the file size you ask the tool to aim for. Several things keep the result from matching it to the byte.
- Encoders work with rates, not final sizes. The tool plans how much data to spend per second and the encoder tries to follow that plan. Real footage varies from scene to scene, so the total lands near the plan, not exactly on it.
- Audio takes its share. The soundtrack is part of the file, and its size is added to the video's.
- The container adds overhead. A container is the file format that wraps the video and audio together, such as MP4. It stores indexes, timing information, and metadata, which add a small amount on top.
- Encoding has practical floors. Below a certain data rate, an encoder cannot go lower in a meaningful way, so a very small request may be overshot.
- Units differ. Some systems count a megabyte as 1,000,000 bytes and others as 1,048,576 bytes. The same file can show as 25.0 MB in one place and 23.8 MB in another.
None of this is a fault. It is how video encoding works, and it is why the tool describes the target as an estimate.
Leave a margin below a hard limit
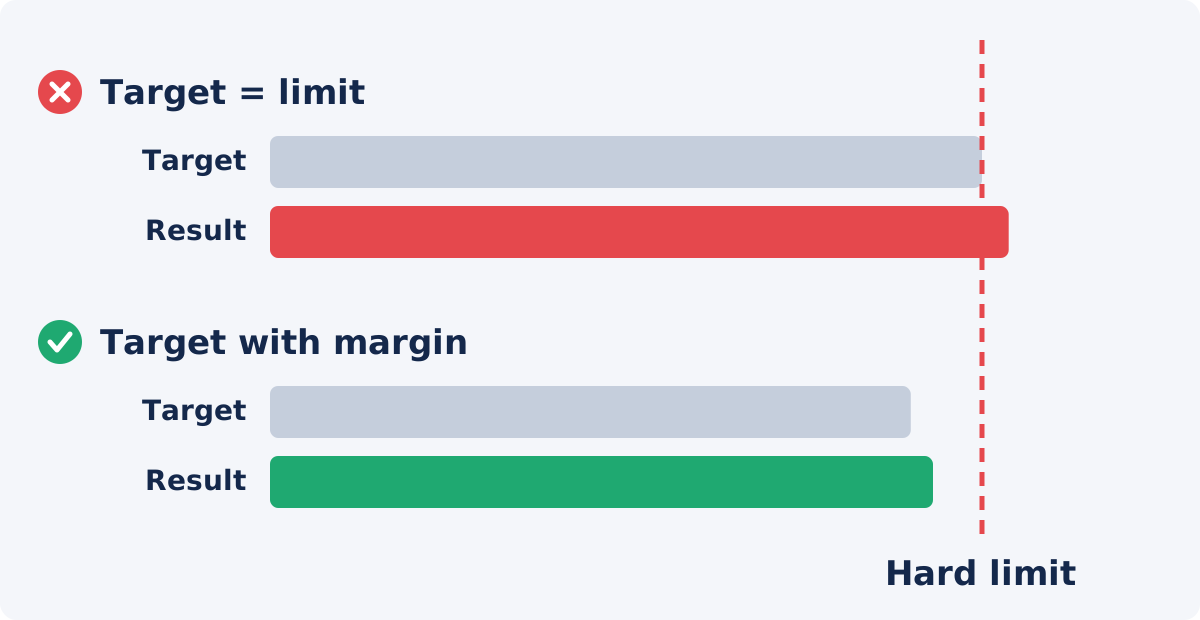
Because the result can come in slightly over the request, never enter the limit itself. Enter a smaller number, so a small overshoot still fits.
There is no official margin that suits every case. As a working habit, many people aim 5–10% below a hard limit, and a little more for short clips, where fixed overhead is a bigger share of the file. For a 100 MB limit, that means asking for roughly 90–95 MB. Then verify the result. If it comes in over the limit, lower the target and compress the original again.
Check how the service states its limit, too. Email is a well-known trap: attachments are encoded for transport, which makes them larger in transit than they are on disk. A file that is slightly under the stated limit can still be rejected. For email, a much larger margin, or a shared link, is the safer choice.
How to compress a video to a specific size in Deus.Video
The Compress Video tool lets you compress a video to a target size without setting any technical parameters yourself.
- Confirm the real limit. Look up the current maximum file size in the documentation of the service you are uploading to. Limits change, so do not rely on a number you remember.
- Remove what you do not need. If the video has dead time at the start or end, cut it first. See the section on trimming below.
- Upload the original video by drag and drop or with the file picker.
- Set Compression method to Target file size. The preset list is replaced by a field labeled Target size (MB).
- Enter the target in MB, with your margin already subtracted. The field accepts values from 0.1 MB. A note under the field reminds you that the final size may differ slightly from the target because of encoding and container overhead.
- Click Compress video and wait for processing to finish.
- Download the result. The processed file is an MP4.
- Check the actual size and play the file, as described in the verification section.
- Adjust if needed. Use Reset, upload the original again, and enter a new value. Do not compress the already compressed file.

Duration, bitrate, and size
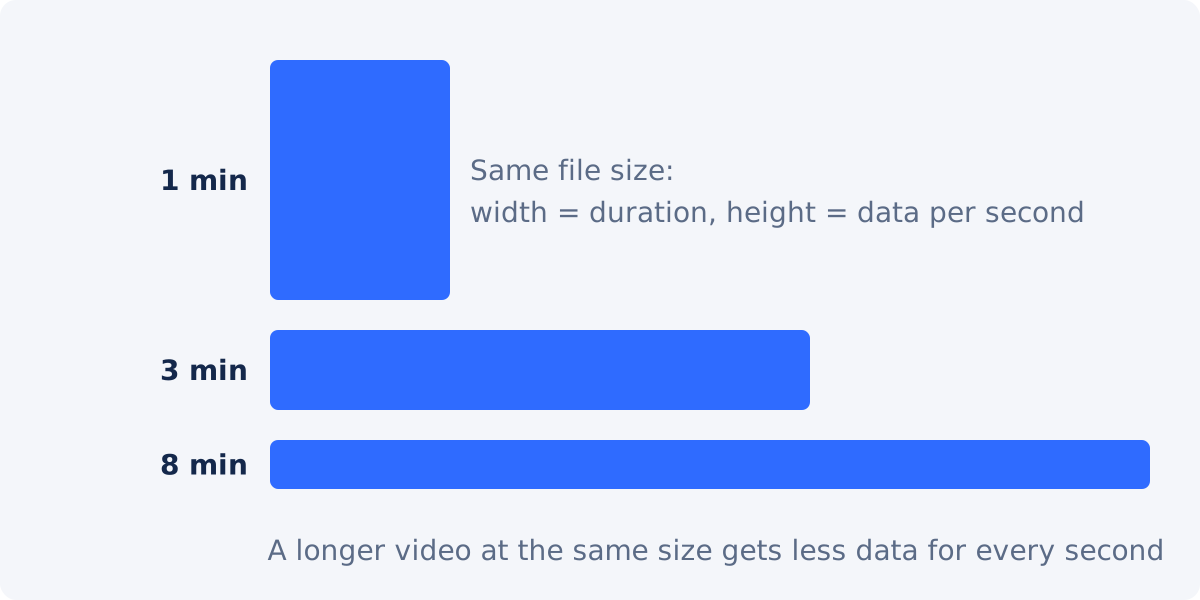
You do not need formulas to use the tool, but one idea explains almost everything about target sizes. Bitrate is the amount of data used for each second of video and audio. Roughly speaking, file size is that data rate multiplied by the duration.
Turn that around, and you get the consequence that matters. For a fixed target size, a longer video leaves less data for every second. A one-minute clip squeezed into 20 MB has plenty of data per second and can look very good. A ten-minute clip squeezed into the same 20 MB gets a tenth of that, and it will show.
This is a way of thinking about the tradeoff, not a description of the tool's internal calculations. The practical lessons are simple. Short videos tolerate small targets. Long videos need large ones. And when a long video must fit a small limit, shortening it is often more effective than compressing harder.
What happens when the target is unrealistically small
Every video has a point below which it cannot be compressed and still look acceptable. If the target is below that point, one of two things usually happens.
- The result misses the target. The file comes out larger than requested, because the encoder cannot sensibly go lower.
- The result hits the target and looks bad. Expect heavy blur, blocky squares, banding in gradients, smeared motion, and thin or watery audio.
Signs that your request is unrealistic: the target is a tiny fraction of the source size, the video is long, and the content is busy, with motion, crowds, water, foliage, or grain. When that happens, change the plan instead of pushing the number lower.
- Trim the video to the part that matters.
- Split it into parts and send them separately.
- Reduce the frame dimensions with Resize Video when the viewing size allows it.
- Share a link from cloud storage instead of attaching the file.
- If only the sound matters, such as a recorded talk, extract the audio and send that.
Target strategies for common situations
| Situation | Target strategy | Quality risk |
|---|---|---|
| Hard upload limit on a form or portal | Target 5–10% under the limit; verify the size in bytes | Low to moderate, depending on length |
| Email attachment | Target well under the stated limit, or share a link | Often high, because limits are small |
| Short clip, generous limit | Consider the higher-quality preset instead of a target | Low |
| Long recording, small limit | Trim or split first; then set the target | High if compressed whole |
| Busy footage: sports, water, crowds, grain | Allow a larger target than you would for a calm clip | High at small targets |
| Screen recording with small text | Avoid very small targets; check text sharpness | Moderate; text shows halos early |
| Personal storage goal | Use the target as a guide; keep the master elsewhere | Your choice |
| Target far below what the video can carry | Change the plan: trim, split, resize, or link | Very high, or the target is missed |
Verify the resulting size and playback
- Read the size in bytes. In the file's properties or info panel, look at the exact byte count, not only the rounded MB figure.
- Compare it with the limit in the same units. If you are unsure how the service counts a megabyte, assume the stricter reading: 1 MB as 1,000,000 bytes.
- Play the whole file. Confirm it opens, runs to the end, and has the expected duration.
- Check sound and sync. Listen to the beginning and the end, and watch a moment where someone speaks on camera.
- Inspect the hardest scenes for blocking, banding, and smeared motion.
- Do a test upload before the deadline, if the service allows it.
Trim first when there is unnecessary duration
Stronger compression gives the encoder less data for every second. Trimming instead removes seconds you do not need. If a recording has setup at the start, a long pause, or an ending that runs on, cutting those parts lowers the duration and leaves more of the target-size budget for the footage that matters. The trimmed output may still be re-encoded, so check it before the next step.
The standalone Compress Video tool works on the whole file. It has no trim or partial-range option. Use Trim Video first, then compress the trimmed file. If you need several edits, do them together in the full Deus.Video editor, so the video is encoded as few times as possible.
Conclusion
A target size is a request, and the result lands near it, not on it. Know whether your limit is hard or soft, leave a margin under a hard limit, remember that longer videos need larger targets, and change the plan when the number is unrealistic. Then check the bytes and play the file before you depend on it.
Have a limit to meet? Open the Compress Video tool, switch to Target file size, and enter your number with a margin.
Frequently asked questions
Will the output be exactly the size I enter?
No. The value is a target. Video, audio, metadata, and container overhead can make the final file slightly larger or smaller. Enter a value below any hard limit, and check the downloaded file's actual size.
How much margin should I leave?
There is no universal figure. Aiming 5–10% under a hard limit is a common working habit, with more room for short clips and for email. Verify the result, and adjust if it comes in over.
What is the smallest target I can enter?
The field accepts values from 0.1 MB. Whether a very small target produces a usable video depends on the length and content. For most videos longer than a few seconds, tiny targets mean heavy visible loss.
The result is larger than my target. What should I do?
Go back to the original file and try a lower value. If the result still overshoots, or the quality collapses, the target is unrealistic for this video. Trim it, split it, reduce its frame size, or share a link instead.
Should I use a preset or a target size?
Use target size when a specific limit exists. Use a preset when the balance between quality and size matters more than a number. "High quality, medium size" favors the picture. "Low quality, small size" favors a smaller file.
Can I compress only part of the video to save space?
Not in the standalone tool, which processes the whole file. Trim the video first, or use the full editor, then compress the shortened version.


