Prepare the script
A voiceover sounds natural when it is written for the ear. Short sentences work. Long sentences with several clauses are hard to read aloud and hard to follow.
- Watch the video first and note scene times. Write down when each scene or step begins. These notes become your sync points later.
- Write to the picture. Describe what the viewer cannot see, such as the reason for a step. Do not read out what is already obvious on screen.
- Check the length. Read the script aloud against the video with a timer. Many people speak around 140 to 160 words per minute at a relaxed pace, so a one-minute video has room for roughly that many words, minus pauses.
- Mark pauses. Leave gaps where the picture should speak for itself, or where a scene changes.
Set up a quiet recording environment
The room matters more than the microphone. Hard, empty rooms produce echo, and echo is very hard to remove afterward. Deus.Video does not clean up recordings, so aim to capture a clean sound from the start.
- Choose a small room with soft surfaces: carpet, curtains, a sofa, a closet full of clothes.
- Turn off fans, air conditioning, and notifications. Close windows.
- Record a few seconds of silence and listen back on headphones. Hum, traffic, and computer fans are easier to notice that way.
Recording tips
Distance
Keep the microphone about a hand's width from your mouth, slightly off to the side, so bursts of air from "p" and "b" sounds do not hit it directly. Stay at the same distance for the whole recording. Moving closer or farther changes both the volume and the tone of your voice.
Room noise
The closer the microphone, the less room noise it picks up compared with your voice. If you hear the room in the recording, move closer, add soft material around you, or record at a quieter time of day.
Consistent level
Speak at an even volume and do a test pass. If your recorder shows a level meter, keep the loudest words out of the red. When peaks are too loud, they are cut off, which causes clipping, a harsh crackle that cannot be repaired later. A slightly quiet, clean recording is more useful than a loud, distorted one, because you can raise the track volume in the mix.
One file or several
You can record the narration in one take or as a separate file for each scene. Separate files are easier to position, because each one can be moved without affecting the others.
Narration file versus original video audio
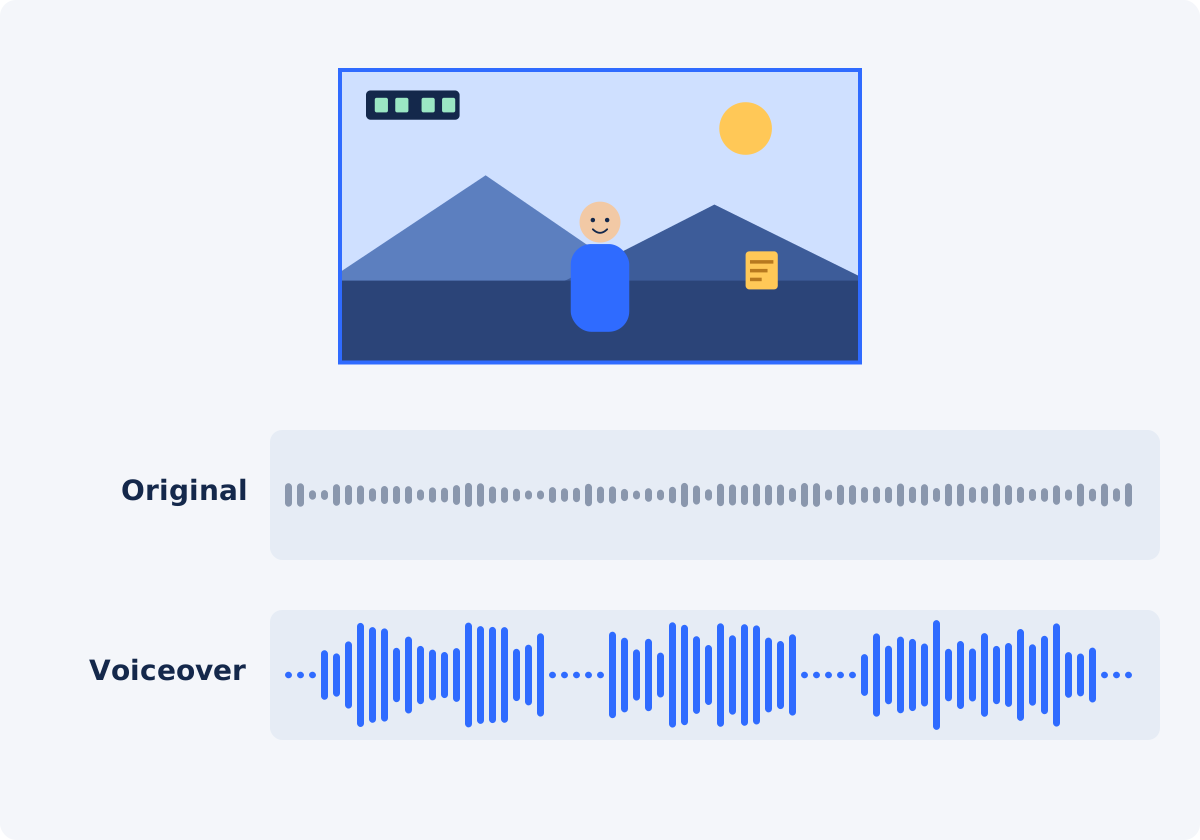
Two different sound sources are involved. The original soundtrack is the audio already inside the video file, such as ambient sound, a presenter on camera, or system sounds from a screen recording. The narration file is a separate audio file that you upload.
In the tool, these are controlled independently. The narration is a track with its own position, volume, and fade. The original soundtrack is either kept in the mix or switched off as a whole. The tool does not edit inside the original soundtrack, so you cannot silence just one sentence of it there.
How to add a voiceover in Deus.Video
With your narration recorded, use the Add Audio to Video tool to add a voiceover track to the video.
- Upload the video. MP4, MOV, AVI, WebM, MKV, and other common formats are accepted.
- Add the narration file or files. Use Add audio files after the video has finished uploading. Each file becomes a separate track.
- Select a track and set Track start. This is the moment in the video when the narration begins.
- Set Track end. The narration is heard only between Track start and Track end. Make the range long enough for the full recording. The Full preset sets the range from 0 to the full available duration.
- Adjust Audio source offset if needed. Use it to skip a cough, a countdown, or silence at the beginning of the file.
- Decide what happens to the original sound. With the Keep original video audio checkbox checked, the video's own sound stays under your voice. Uncheck it for narration only.
- Set Volume and a short fade. Raise or lower the narration so it is comfortable to hear. A brief fade softens the start and end of the track. Fades are applied during processing, so you will hear them in the download, not in the preview.
- Preview the timing. Watch the scene changes and listen for words that arrive early or late.
- Process and review. Click Add audio to video, download the result, and watch it from start to finish.

Timeline start and end, and source offset
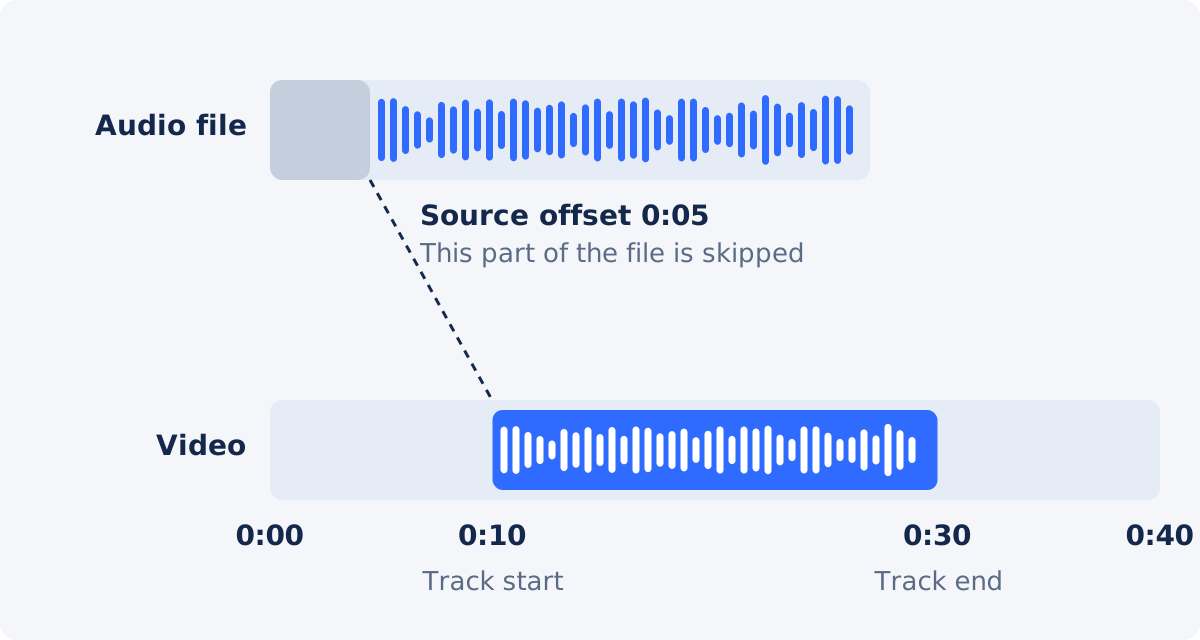
These settings answer two different questions. Track start and Track end answer "when in the video is this track heard?" Audio source offset answers "from which point inside the audio file does playback begin?"
Here is an example. Your narration file opens with five seconds of throat-clearing, and the first scene that needs narration begins at 0:10. Set Track start to 0:10 and Audio source offset to 5 seconds. When the video reaches 0:10, the narration begins from the fifth second of the file, which is your first real word.
Track end sets the moment up to which the track plays in the video and in the exported mix. If the range is shorter than the remaining audio, the narration stops at Track end even if the file continues. This limits how much of the file is used. It does not edit the audio file itself. Track end always has to be later than Track start. If the file is shorter than the range, the narration simply ends when the file ends. It is not repeated.
Keep the ambience or switch off the original soundtrack
Ambience is the natural background sound of a place: street noise, a workshop, keyboard clicks. Keeping it under a voiceover can make a video feel real. It can also fight with your voice.
- Keep the original audio when it is quiet background sound that adds atmosphere, or when parts of the video contain speech you still need.
- Switch it off when it contains talking that would clash with the narration, loud music, wind noise, or an old voice track you are replacing.
The original soundtrack is kept or removed as a whole, and its level is not set per section in this tool. If the ambience is too loud under your voice, the practical options are to raise the narration volume moderately, to switch the original sound off, or to move to the full editor for finer control. If you need a silent version of the video for another purpose, you can remove the audio from the video as a separate step.
Synchronize narration with scenes
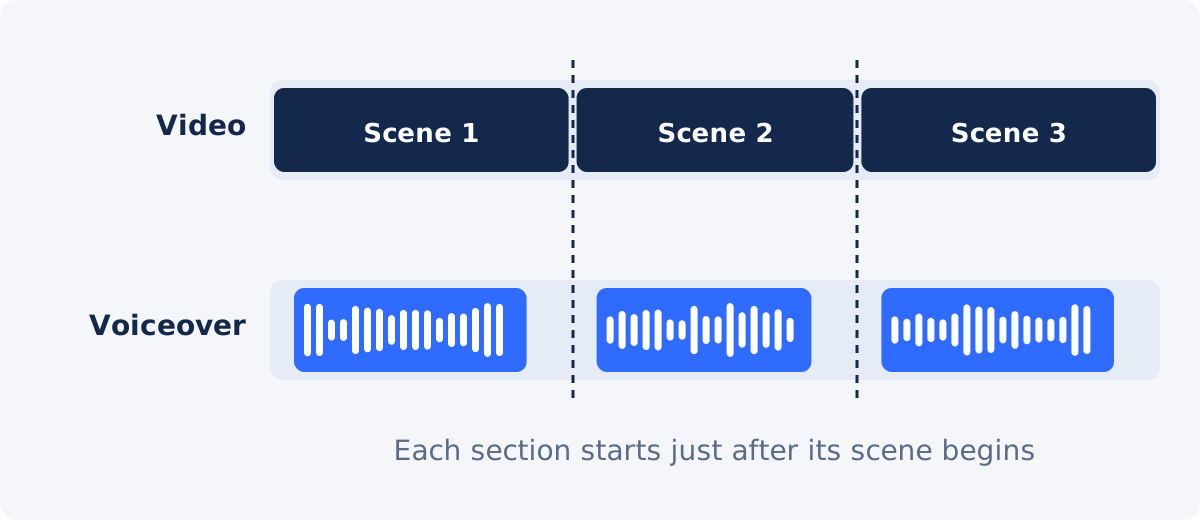
Use the scene times you noted while writing the script. For each narration section, set Track start to the moment its scene begins, or a fraction of a second later. The time fields accept decimals, so you can type a value such as 0:12.4 or 1:02.5. Viewers need a moment to take in a new picture before they can listen.
If you recorded one long take, sync the first sentence and then check the later scenes. Small differences between your reading pace and the video add up, so the last scene may be noticeably off even when the first is right. When that happens, split the recording into separate files outside the tool, one for each scene, and upload them as separate tracks. Each can then be positioned on its own.
Leave a short gap between sections. Narration that runs continuously across a scene change feels rushed, and a gap gives you room to adjust positions without overlapping two voice tracks.
Troubleshooting
| Voiceover problem | Likely cause | Fix |
|---|---|---|
| Narration starts before the scene appears | Track start is too early | Move Track start to the scene time from your notes, then preview again |
| The first word is missing | Audio source offset is too large | Reduce the offset slightly until the first word is complete |
| A countdown or breath is heard before the narration | Audio source offset is too small | Increase the offset to skip the unwanted opening |
| Narration stops mid-sentence | Track end is earlier than the end of the recording | Move Track end later, or shorten the script for that scene |
| Timing is right at the start and drifts later | One long take read at a different pace than the video | Split the recording into sections and position each one separately |
| Voice is hard to hear | Original audio or music is competing with it | Switch off the original audio, lower other tracks, or raise the narration moderately |
| Voice sounds harsh or crackly | Clipping in the recording, or the track volume is set too high | Lower the track volume; if the file itself is distorted, record again at a lower level |
| Voice sounds distant and echoey | Microphone too far away in a reflective room | Record again, closer to the microphone, in a softer room |
When you need the full editor
The standalone tool mixes audio with one finished video. Move to the full Deus.Video editor when the project needs more than that:
- Cuts. You want to shorten or rearrange scenes so the picture fits the narration.
- Captions or on-screen text. You want the narration shown as subtitles or supported by titles.
- Section-level changes. You need different audio levels in different parts of the video, or a more complex arrangement of music, voice, and effects.
After processing in the standalone tool, you can also continue editing the result in the full editor.
Conclusion
A good voiceover is a clean recording placed at the right moments. Write for the ear, record close to the microphone in a quiet room, and keep your level steady. Then use Track start, Track end, and source offset to line each section up with its scene, decide whether the original sound helps or hurts, and review the processed download.
Have your narration ready? You can add audio to a video online with Deus.Video and position each voiceover section on the timeline before you export.
Frequently asked questions
Can I record my voice directly in the tool?
No. The tool works with uploaded audio files. Record the narration with your phone's voice recorder, a computer, or another recording app, save the file, and upload it.
What audio format should the narration be in?
The audio picker accepts audio files that your browser recognizes. Support can depend on the codec inside a file, so confirm that your file plays in the preview and check the processed download.
Can I use several voiceover files in one video?
Yes. Each uploaded file becomes a separate track with its own start, end, source offset, volume, and fade. Recording one file for each scene makes synchronization easier.
Does the tool remove background noise from my recording?
No. There is no noise reduction or audio cleanup. Record in a quiet room, close to the microphone, and listen to a test before recording the full script.
Can I mute only part of the original video audio?
Not in the standalone tool. The original soundtrack is kept or switched off for the whole video. For changes to individual sections, use the full editor.
Can the tool create captions from my voiceover?
The Add Audio tool does not transcribe narration. If you want captions, add them as a separate step in the full editor or with a subtitles tool.


