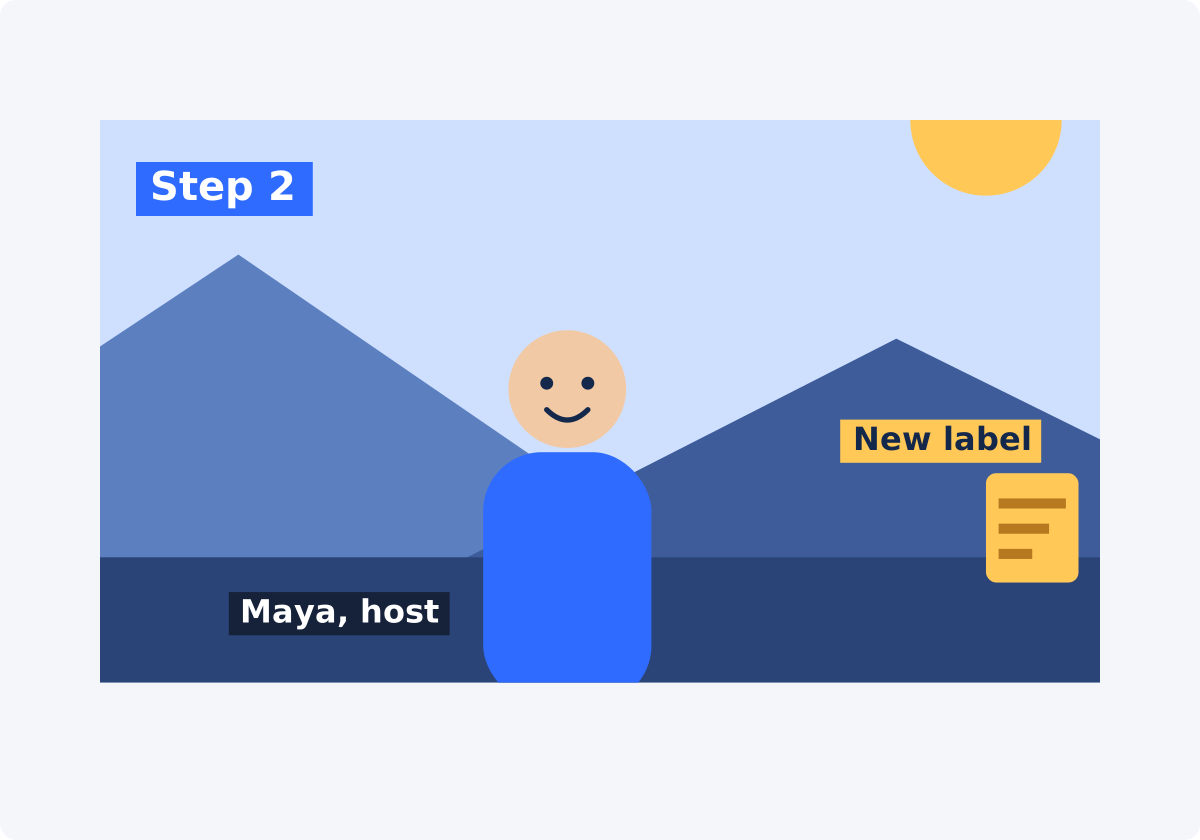
What labels and callouts are for
A label names something. A callout points at something and adds a short piece of information. Both are overlays, which means text drawn on top of the video picture, and both are useful only for the few seconds when the viewer needs them.
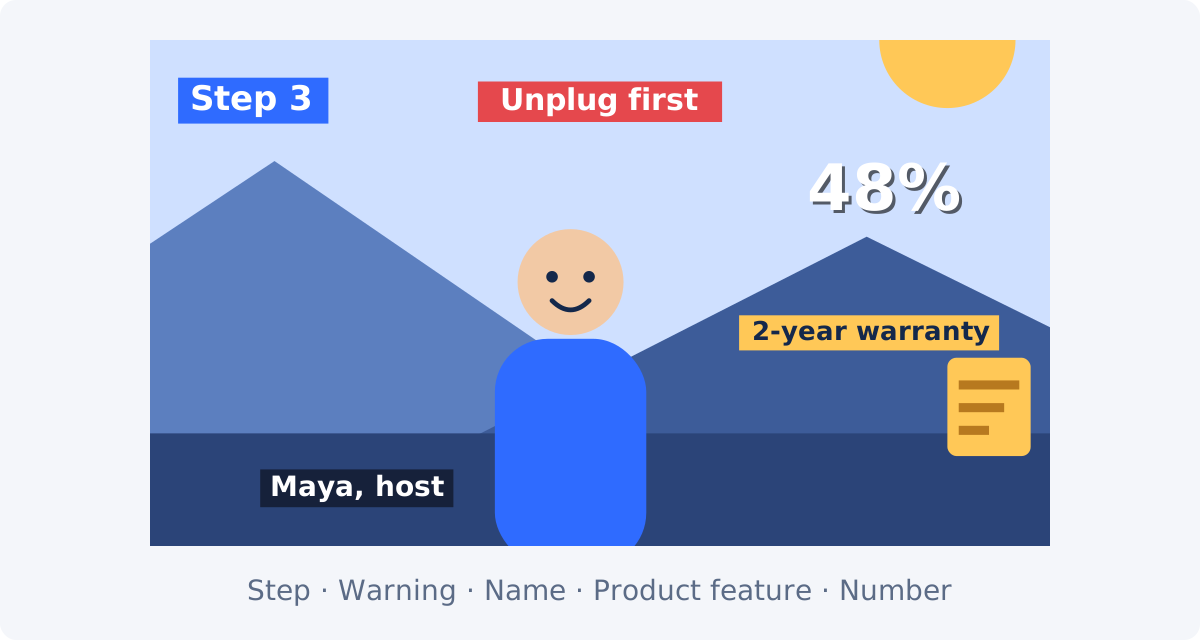
- Tutorial step. "Step 2: Attach the bracket." It marks progress and helps people find their place when they rewind.
- Product feature. "Waterproof zipper." It appears beside the detail while that detail is in view.
- Speaker name. "Maya Chen, Head Baker." It appears shortly after a person starts talking.
- Location or date. "Porto, day 3." It sets the scene at the start of a sequence.
- Warning. "Unplug the device first." It has to arrive before the risky action, not during it.
- Number. "48% faster," "$29." One figure, shown large, while the narration explains it.
One layer for each message
A text layer is a separate piece of text with its own wording, style, position, size, rotation, and timing. Inside one layer, all the text shares the same font, size, and color, and it all appears and disappears together.
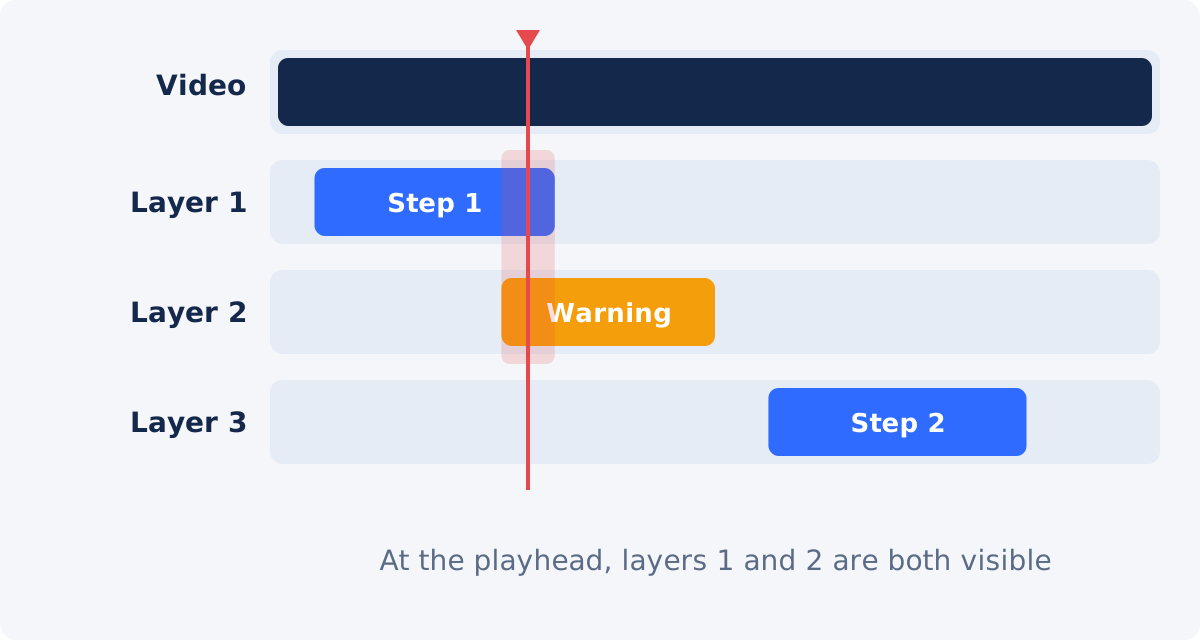
So the rule is simple: whenever two pieces of text need different timing or a different look, they need to be different layers. "Step 1" and "Step 2" are two layers. A name and a job title can share one layer, because they belong together and show at the same time. A warning in red and a step label in blue are two layers, even if they overlap in time.
Start time, end time, and the timeline position
The timeline is the time axis of the video. Each layer has a Start and an End, and it is visible only between them. The playhead marks the current position on that axis. As you play or scrub the video, the preview shows the layers that are active at the playhead's position, so what you see is what a viewer would see at that moment.
To time a callout to an action:
- Scrub to the moment the action or object appears, and note the time.
- Scrub to the moment it ends or stops mattering, and note that time too.
- Enter the two values as the layer's Start and End.
- Move the playhead just before Start and play through, to confirm that the text arrives and leaves at the right moments.
The note under the time fields is worth remembering: Start and End control when the selected layer is visible. If a layer seems to have vanished from the preview, the playhead is probably outside its range.
Drag, resize, rotate, and the layer list
You position a layer directly in the preview. Drag it to move it. Use the corner handles to resize its frame. In this tool, resizing the frame does not change the size of the letters, which is set in the Font size field. Use the separate rotation handle to turn it, or type a value between -180° and 180° in the Rotation field.
The layer list under the player shows every layer with its wording and time range. Edit selects a layer, so its settings load into the panel, and Delete removes it. The Current status block shows the active layer's name, position, size, and visible range. Those numbers are handy when you want several labels to share a position. Note one layer's position, then drag the next to match it.
Rotation suits informal stickers and stamps. Keep instructional text level, because rotated words are slower to read.
How to add timed labels in Deus.Video
Use the Add Text to Video tool to create a timed text layer for each label or callout.
- List your callouts first. Watch the video and write down the wording with its start and end time, for example "0:12–0:16, Step 1: Mix dry ingredients."
- Upload the video. If it contains long sections you will not use, trim the video first, so your times stay valid.
- Set up the first layer. Select the sample layer and click the Label preset, which sets 28-point white text on a dark box at 0.8 opacity. The preset replaces the wording with a placeholder, so type your own text in the Text field afterward.
- Style it. Choose font and size, text color, and a background box or an outline so it stays readable over the footage.
- Drag it next to its subject in the preview.
- Enter Start and End from your list.
- Add the next layer. Type new wording and click Add text, then repeat the styling, position, and timing.
- Play the whole video and watch each layer arrive and leave.
- Click Add text to video to process the file, then download and review it.

Timing for readability
The tool does not calculate reading time, so the duration is your call. A few working rules help.
- Read it aloud, twice. The time that takes is a sound minimum for a viewer who is also watching the picture.
- Give it a floor. Even a one-word label needs about a second and a half to be noticed and read.
- Let the picture settle first. After a cut, wait a fraction of a second before showing text. Viewers need a moment to take in the new scene.
- Lead warnings. Show a warning a second or two before the action it concerns.
- Remove it when it stops being true. A callout that points at a product should end before the product leaves the frame.
Text appears and disappears as a cut, without a fade. Placing the start on or just after a visible action makes the arrival feel motivated.
Preventing overlaps between layers
Several layers can be active at once. That is useful, for example a persistent step label plus a brief warning, but only if the layers do not collide.
- Assign zones. Decide where each type of text lives: step labels top left, names lower left, product callouts beside the product. Layers in different zones cannot overlap, whatever their timing.
- Sequence layers that share a zone. If Step 1 and Step 2 use the same position, end the first before the second starts, and leave a short gap, so the change is noticeable.
- Check the handovers. Put the playhead at each layer's Start time and see what else is visible at that moment.
- Limit simultaneous text. Two text elements on screen at once is plenty for most videos. With three, viewers start to miss things.
- Leave room for subtitles. If the video has or will have subtitles, keep callouts out of the bottom of the frame.
Callout types at a glance
| Callout type | Ideal length | Placement | Visibility duration consideration |
|---|---|---|---|
| Tutorial step | "Step N" plus 2–5 words | Same corner every time, often top left | For the whole step, or the first few seconds of it |
| Product feature | 2–4 words | Beside the feature, not on it | Only while the feature is clearly in view |
| Speaker name | Name plus a short role | Lower left or right, clear of the face | Starts after the first words; stays long enough to read twice |
| Location or date | 1–4 words | A lower corner, small | At the start of the scene; a few seconds |
| Warning | 2–5 words, starting with the action | Upper center or near the hazard, with strong contrast | Begins before the risky action; stays through it |
| Number or statistic | One figure plus a unit | A calm area, large | While the narration discusses the figure |
When you need animation, keyframes, or the full editor
The standalone tool is built for static, timed text. A layer keeps one position, size, and rotation for its whole range. It does not track objects, attach itself to a moving subject, or animate. If a product moves across the frame, a callout in this tool stays where you placed it. You can work around small movements by placing the text where the subject spends most of the layer's time, or by splitting the callout into two shorter layers at different positions.
For more than that, continue in the full Deus.Video editor. There, text elements have an Effects setting and keyframe buttons beside their properties, so text can change over time, and text sits on a multi-track timeline together with clips, audio, images, and subtitles. After processing a video in the standalone tool, you can also continue editing the result in the full editor.
Two related tools are worth knowing. For arrows, icons, badges, or a logo, use Add Image to Video. For spoken dialogue shown line by line, use Add Subtitles to Video instead of dozens of text layers.

Conclusion
Timed labels work when each one has a single job, a fixed home in the frame, and a time range tied to what is on screen. Plan the list before you start, build one layer for each message, keep types of text in their own zones, and play the whole video to check every arrival and exit.
Have your list of callouts ready? Open the Add Text to Video tool, add a layer for each one, and set when it appears.
Frequently asked questions
Can a label follow a moving object?
Not in the standalone tool. A layer stays at one position for its whole range, and there is no motion tracking. Place the label where the object spends most of that time, split it into shorter layers, or animate the position with keyframes in the full editor.
How many text layers can I add?
You can add multiple layers, each with its own style and timing. In practice, a handful to a dozen is comfortable to manage in the layer list. For long sequences of dialogue lines, a subtitle workflow is a better fit.
How do I make a label appear at an exact moment?
Scrub the video to that moment, read the time from the player, and type it into the layer's Start field. Then play from a second earlier to confirm. Do the same for End.
A layer disappeared from the preview. Where did it go?
The preview shows only the layers that are active at the playhead's position. Move the playhead inside the layer's Start and End range, or select the layer with Edit in the layer list.
Can two labels be on screen at the same time?
Yes. Layers with overlapping time ranges are shown together. Give them different positions so they do not cover each other, and avoid more than two or three at once.
Can I reuse one style for all my labels?
The Label preset gives each new layer the same starting point: font size 28, white text, and a dark box at 0.8 opacity. For custom styles, note the values you chose, such as font, size, colors, and box settings, and enter them again for each layer, so the set stays consistent.


