Prepare the logo file
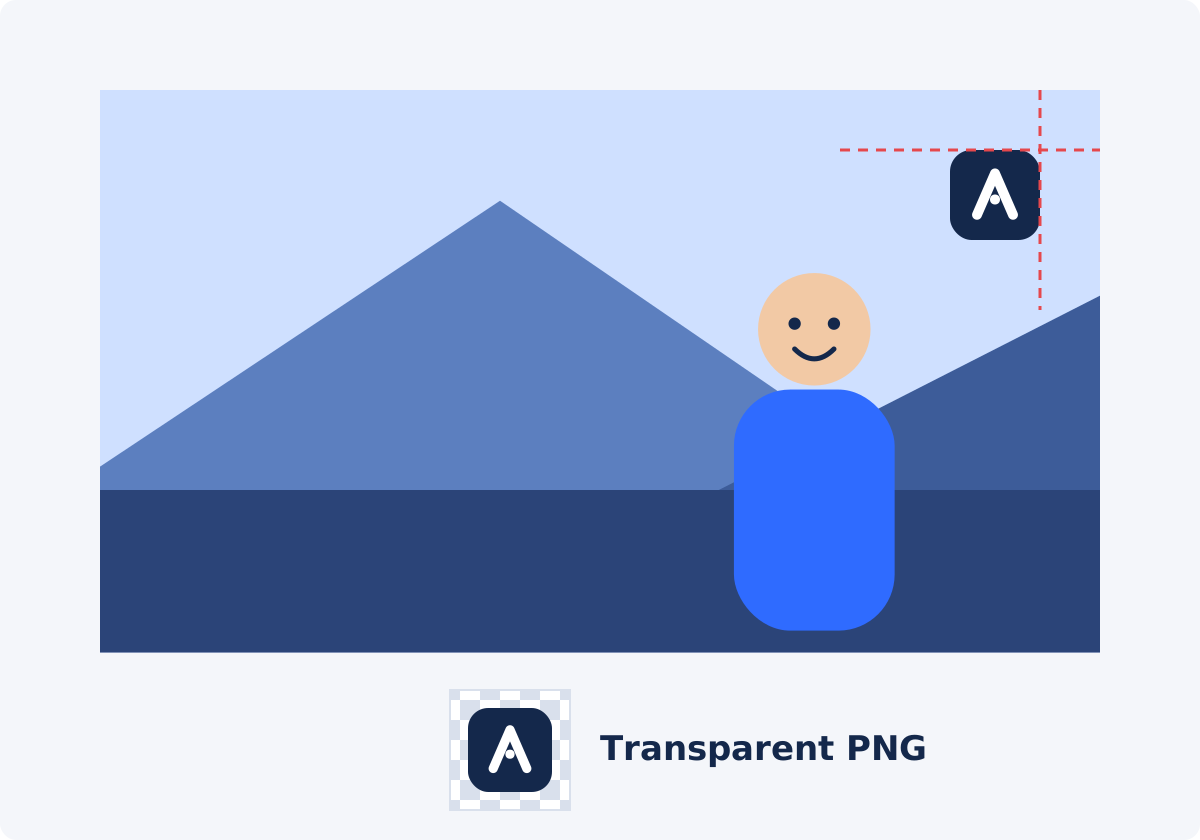
A logo placed over a video is an overlay: an image drawn on top of the video picture. The tool shows the file as it is. It does not remove a background or adjust colors, so the preparation happens before you upload.
Why a transparent PNG works well
Transparency means that some pixels in the image are see-through. The information that stores this is called the alpha channel. A PNG file can carry an alpha channel, so everything around the logo shape can be transparent, and the video shows through.
A JPG file cannot store transparency. A logo saved as JPG always comes with a solid rectangle behind it, usually white. Over a video, that rectangle covers part of the picture and looks like a label stuck on the screen. If your brand has a version with a deliberate solid background, that is a design choice. Otherwise, export the logo as a PNG with a transparent background from the design file.
Choose the right version of the logo
- Simplified mark. At overlay size, a symbol or a short wordmark reads better than a full logo with a tagline.
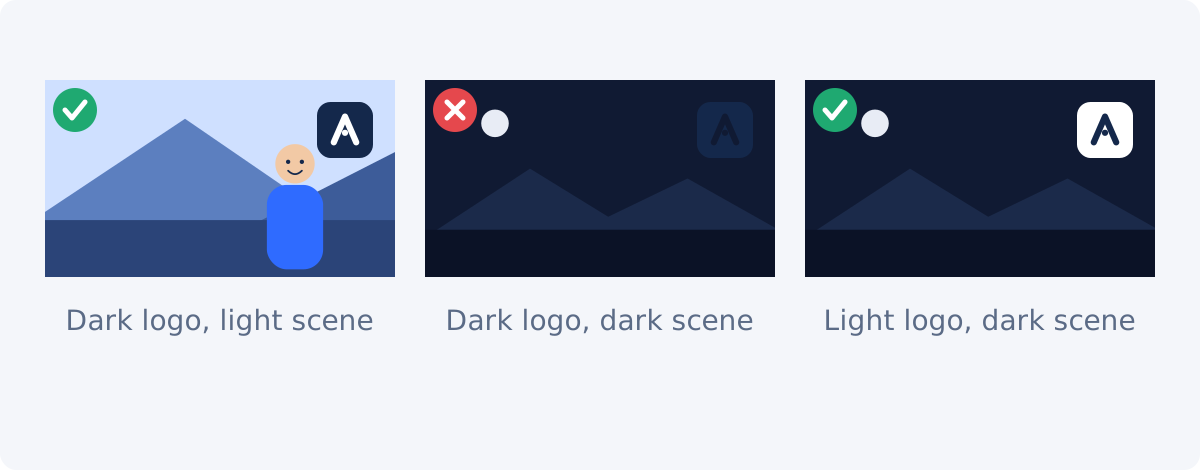
- Light and dark versions. Most brand kits include both. You will need the one that contrasts with your footage.
- Enough pixels. Export the logo larger than it will appear. An image scaled down stays sharp. An image scaled up turns soft.
- Tight canvas. Trim empty transparent space around the logo in your design tool. Extra padding makes positioning and margins harder to judge, because the layer's box is bigger than the visible mark.
Corner placement and visual margins
Corners are the standard home for a logo because the center of the frame belongs to the subject. Which corner depends on your footage and on where the video will be shown.
- Top right or top left is usually the safest choice. It stays clear of subtitles and lower-third titles.
- Bottom right is familiar from television, but check it against captions, player controls, and platform interface elements.
- Bottom left often collides with names, titles, and captions.
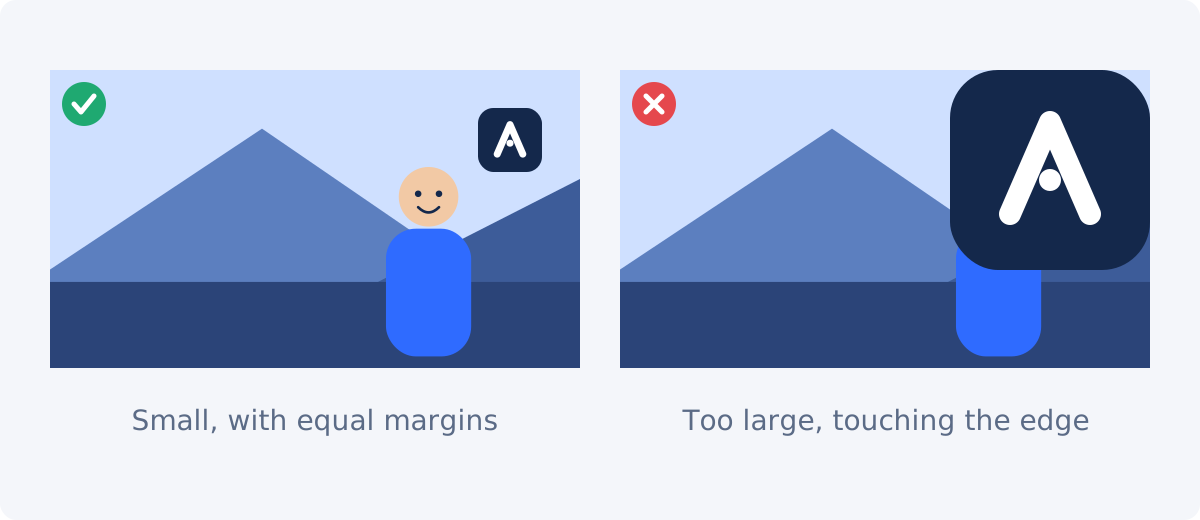
Leave a margin between the logo and the frame edges, and make the horizontal and vertical margins equal. A logo that touches the edge looks cut off on some screens, and unequal margins look accidental. A margin of roughly 3–5% of the frame width is a reasonable starting point.
The tool does not mark safe areas or snap the logo into place. You judge the margins by eye in the preview, or keep them consistent with the X and Y values.
The Logo preset and manual adjustment
The Image parameters panel has three Quick presets: Logo, Sticker, and Center. The Logo preset gives the selected layer a small, corner-style starting placement. Treat it as a first draft. Every video has a different composition, and you will usually adjust the result.
There are two ways to adjust a layer. You can drag it in the preview and use the corner handles to resize it. Or you can type exact values in the X, Y, Width, and Height fields. Dragging is faster. Typing is more precise, and it lets you write the values down and reuse them, so the logo sits in the same place across a series of videos with the same frame size.
Size, timing, and rotation
Size
A brand logo in a corner normally takes up a small share of the frame, often somewhere around 8–15% of the frame width depending on the shape of the mark. Wide wordmarks need more width than compact symbols. If you can read it comfortably on a phone without it pulling your eye away from the subject, the size is right.
Width and Height are independent fields. The tool does not lock the aspect ratio, which is the relationship between an image's width and height. If you change one value and not the other, the logo is stretched. To keep the proportions, change both values by the same factor. For a logo that is 400 × 200 pixels, any pair with a 2:1 ratio works, such as 160 × 80 or 120 × 60.
Timing
Each image layer has its own Start and End time on the timeline, which is the time axis of the video. For a constant brand mark, set Start to the beginning and End to the end of the video. For an intro or outro logo, limit the range to those few seconds. The layer appears and disappears at those times without a transition. If you want the logo to fade or animate, that is a job for the full editor.
Rotation
The Rotation field accepts values from -180° to 180°, and there is a rotation handle in the preview. For a brand logo, leave it at 0. Brand guidelines almost never allow a tilted logo. Rotation is more useful for stickers, stamps, and playful graphics.
Check the logo on light and dark scenes
A video is not one background. It is hundreds of them. A dark logo disappears over a night scene, and a white logo disappears over snow or a bright sky. The tool does not adapt the logo to the footage, so this check is yours.
- Scrub through the video and stop on the brightest scene and the darkest scene.
- Look at the corner where the logo sits, not at the whole frame.
- If the logo is hard to see in either, try the other color version, or move it to a corner with calmer content.
- If no single version works everywhere, prepare a version of the logo with its own solid or softly shaped backing in your design tool, and upload that.
Logo problems and better approaches
| Logo problem | Cause | Better approach |
|---|---|---|
| White box around the logo | File has no transparency, usually a JPG | Export a PNG with a transparent background from the design source |
| Logo looks soft or pixelated | Small source image scaled up | Upload a larger export and scale it down in the tool |
| Logo looks squashed or wide | Width and Height changed by different factors | Recalculate both values from the source ratio |
| Logo disappears in some scenes | Low contrast with the footage in that corner | Use the light or dark version, or choose another corner |
| Logo covers captions or a face | Placement chosen on a single frame | Review the full timeline and move the logo to a clear corner |
| Logo distracts from the content | Too large or too close to the subject | Reduce the size and keep it near a corner with equal margins |
| Pale fringe around the logo edges | Background was removed poorly before export | Re-export from the original vector or layered file |
Watermark or brand logo?
The two look similar and serve different purposes. A brand logo is there for recognition. It is small, clean, fully visible, and sits in a corner. A watermark is there to mark ownership or to discourage reuse. Watermarks are often larger, placed closer to the center, and semi-transparent, so they are hard to crop out without ruining the picture.
The standalone tool has no opacity control. If you want a semi-transparent watermark, create that transparency in the image file itself before uploading, by exporting a PNG whose artwork is already partly see-through. Neither a logo nor a watermark is a legal protection by itself, and this guide does not offer legal advice. If ownership matters for your project, look into the terms of the platforms you publish on and ask a qualified professional.
How to add a logo in Deus.Video
The Add Image to Video tool lets you place a logo over a video as an image layer with its own position, size, and timing.
- Upload the video. Common formats such as MP4, MOV, AVI, WebM, and MKV are accepted.
- Click Add image and choose the logo file. It appears as a layer in the preview and in the layer list under the player.
- Apply the Logo preset for a starting placement.
- Adjust the position. Drag the layer to the corner you chose, or enter X and Y values. Keep the two margins equal.
- Set the size. Use the corner handles or the Width and Height fields, keeping the source proportions.
- Set Start and End. Cover the whole video for a constant mark, or a shorter range for an intro or outro.
- Preview the full video. Stop on the brightest and darkest scenes and on any scene with captions.
- Click Add images to video, wait for processing, and download the result.
- Review the download on a phone and on a larger screen.

Common mistakes
- Making the logo too big. A large logo reads as insecurity, not as branding. Go smaller than your first instinct.
- Using a screenshot of the logo. Screenshots carry backgrounds, compression, and low resolution. Get the real file.
- Checking one frame only. The opening frame is rarely the hardest one for the logo.
- Ignoring where the video will be published. Apps draw buttons, captions, and progress bars over the edges of a video. Look at how your target platform displays videos, and keep the logo clear of those areas.
- Uneven margins. A logo 20 pixels from the top and 60 from the side looks misplaced.
- Forgetting the End time. If the layer ends early, the logo vanishes partway through the video.
For a text label next to the logo, such as a website address, Add Text to Video keeps the words editable.
When you need the full editor
The standalone tool covers a static logo with a fixed position, size, and time range. If you need an animated logo reveal, a fade, a semi-transparent mark, or a logo combined with titles and music, continue in the full Deus.Video editor. There, the logo is an image element on its own timeline track. It has an Opacity control, position and zoom fields, and keyframe buttons beside each property for animation. The placement rules from this guide still apply: a clear corner, equal margins, and matching horizontal and vertical zoom, so the logo is not stretched.

Conclusion
A good logo overlay is small, sharp, and consistent. Prepare a transparent PNG at a generous size, place it in a clear corner with equal margins, keep its proportions when you resize it, and check it against your brightest and darkest scenes. Then review the processed file before you publish.
Have your logo file ready? Open the Add Image to Video tool, add the logo as a layer, and set its position and timing before you export.
Frequently asked questions
What file format should a logo be in?
A PNG with a transparent background is the usual choice, because the video shows through around the logo shape. A JPG works only if you want a solid rectangle behind the logo. The image picker accepts browser-supported image files, so confirm that your file displays correctly in the preview.
Can the tool remove the white background from my logo?
No. The tool places the image as it is. Remove the background in a design program, or export a transparent PNG from the original logo file, and then upload it.
How do I keep the logo from stretching?
Width and Height change independently, so keep their ratio equal to the source ratio. For a 500 × 250 logo, use pairs such as 200 × 100 or 150 × 75. If the logo already looks distorted, retype both values.
Can I show the logo only at the beginning or end?
Yes. Set the layer's Start and End to the part of the video where the logo should be visible. The logo appears and disappears at those times.
Can I make the logo semi-transparent?
The standalone tool has no opacity setting. Export a PNG in which the logo artwork is already partly transparent, or use the full editor, which has an opacity control for image elements.
Can I add a logo and other images at the same time?
Yes. You can add several image layers and edit each one separately. If layers overlap in position and time, a later layer may cover an earlier one, so review the places where they meet.


