Why lossy compression can change quality
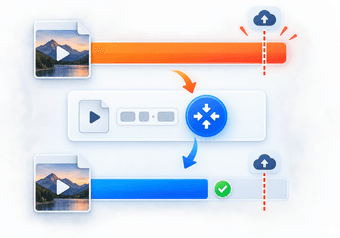
Compression means storing the video with less data. Almost all everyday video uses lossy compression, which reduces data by throwing away detail the encoder judges to be less visible, and by describing how the picture changes from frame to frame without storing every frame in full. Your phone or camera already did this when it recorded the clip.
Compressing the file again repeats that process with a smaller data budget. The amount of data available per second of video is called the bitrate. When the bitrate is generous, the encoder can afford to keep fine detail. When it is tight, the encoder has to simplify: textures get smoother, edges get rougher, and subtle color steps merge.
How visible this is depends on the source. A calm talking-head clip on a plain background can shrink a great deal before anyone notices. A concert shot with confetti, a lake with ripples, or a noisy night scene shows damage much sooner, because there is more unpredictable detail to describe in every frame.
Can you compress video without losing quality? Perceived vs. lossless
"Lossless" has a precise technical meaning: the decoded output is identical to the input, pixel for pixel and sample for sample. Lossless video files exist, but they are very large, and they are not what online compression tools produce.
What most people actually want is different: a file that looks and sounds the same to a viewer at normal size and distance. That is perceived quality. A well-compressed video can be far smaller than its source and still pass that test, even though a pixel-level comparison would show differences.
So the practical goal is visually acceptable, not mathematically identical. Deus.Video does not promise lossless output or identical pixels or audio, and no honest lossy compressor can. The aim of this guide is to help you stay on the right side of "nobody can tell."
How to compress with a quality-first setting
In the Compress Video tool, you can compress a video online with a ready-made preset, or open Advanced settings and target a quality level directly. There is no resolution setting, so the frame size stays the same.
- Find the original file. Use the file from your camera, phone, or editor, not a copy that has already been compressed by a messenger or a social platform.
- Upload it. Drag and drop the video, or use the file picker. Common inputs such as MP4, MOV, AVI, WebM, and MKV are accepted.
- Stay on the Presets tab.
- Choose Basic. This preset puts visual quality ahead of maximum reduction. Strong goes for the smallest file and accepts more visible loss. Super uses the more efficient H.265 codec to keep quality high at a smaller size, but some older devices and browsers cannot play H.265.
- Click Compress video and wait for the progress indicator to finish.
- Download the result, which is an MP4 file, and keep the source file where it is.
- Compare the two files using the checks in the next sections.
- Decide. If the result looks right and is small enough, you are done. If it is still too large, read the section on when a larger file is the better choice before you compress harder.

More control: target a video quality (CRF)
When quality matters more than an exact size, a quality target is the most direct tool. Open Advanced settings and set Compression method to “Target a video quality.” CRF, short for Constant Rate Factor, keeps the quality level steady and lets the file size follow the content: calm scenes get less data, busy scenes get more.
- Pick the codec. H.264 plays almost everywhere. H.265 reaches similar quality with less data, but older devices and some browsers cannot play it.
- Pick the CRF. Lower numbers keep more detail and make larger files. 23 is a common starting point for H.264 and 28 for H.265. For a result that is very hard to tell from the source, try 18–20 with H.264, or roughly five higher with H.265.
- Pick the speed. Slower settings compress a little better at the same quality but take longer. Medium is a sensible default.
With a quality target, the tool cannot predict the final size, so the estimated size reads “Depends on the video.” Check the downloaded file. If it is still too large, raise the CRF by two or three and compress the original again.

Scenes most likely to show artifacts
An artifact is a visible or audible flaw introduced by compression. Artifacts do not appear evenly. They show up first where the picture is hardest to describe with little data.
- Fast or complex motion. Sports, handheld walking shots, quick pans, and crowds.
- Fine random texture. Water, foliage, grass, gravel, hair, fabric, confetti, rain, and snow.
- Noise and grain. Low-light footage carries random noise that is expensive to encode. The encoder either spends data on it or smears it.
- Smooth gradients. Skies, studio backdrops, fog, and soft shadows, where subtle steps in brightness can break into visible bands.
- Dark areas. Shadows often turn into flat, blocky patches.
- Small text and sharp graphics. Screen recordings, captions, logos, and charts have hard edges that show halos quickly.
- Faces. Viewers are very sensitive to skin that looks waxy or smeared, even when the rest of the frame is acceptable.

Compare the source and the output
A quick look at the first few seconds is not a check. Opening shots are often calm and easy to compress. Use a simple routine.
- Open the source and the compressed file in the same player, at the same window size, ideally full screen.
- Pick three moments: the busiest scene, the darkest scene, and a scene with a face or small text.
- Pause both files at the same frame and compare. Then play the moment in motion, because some flaws only show when the picture moves.
- Listen to a section with speech and a section with music or ambient sound on headphones. Strong compression can make audio sound thin, watery, or metallic.
- Check the total duration and watch the ending, to confirm the file is complete and picture and sound stay in sync.
- View the file the way your audience will. A flaw visible on a large monitor may be invisible on a phone, and a file meant for a projector deserves a stricter check.

What the artifacts tell you
| Artifact | Where to inspect | What it indicates |
|---|---|---|
| Blocking: visible squares or tiles | Dark areas, flat walls, fast motion | Too little data for that scene; compression is too strong for this content |
| Banding: stripes in smooth color | Skies, gradients, soft shadows, backdrops | Subtle color steps were merged; common at low data budgets |
| Ringing or halos around edges | Text, logos, high-contrast outlines | Sharp edges are being approximated; typical in screen recordings and graphics |
| Blur or waxy surfaces | Faces, hair, grass, water, fabric | Fine texture was smoothed away to save data |
| Motion smearing or trails | Moving subjects, camera pans | Changes between frames are described too coarsely |
| Pulsing: quality that shifts every second or so | Static shots with fine texture | Quality differs between full frames and the predicted frames between them |
| Thin, watery, or metallic sound | Speech sibilants, cymbals, applause, room tone | The audio was compressed strongly |
Why repeated exports compound loss
Every lossy encode starts from whatever it is given. If you compress a file that was already compressed, the encoder treats the existing artifacts as picture content and spends data preserving them, while discarding a little more real detail. This is known as generation loss.
The chain is often longer than people realize: the camera compresses, the editing app exports, a messenger compresses the upload, someone downloads that copy and compresses it again. Each step on its own may be minor. Together they are not.
- Always compress from the earliest version you have.
- If the first result is not right, go back to the source and compress it again with a different setting. Do not run the compressed file through the tool a second time.
- Do all your edits first, then compress once at the end. If the video needs trimming, text, or other changes, make them before compression, or do everything in the full Deus.Video editor and export once.

When a larger file is the better choice
Sometimes the right amount of compression is less of it, or none.
- The file will be edited again. Editors, colorists, and motion designers need as much of the original information as possible.
- It will be shown large. Projectors, TVs, and event screens reveal flaws that phones hide.
- The content is the hard kind. Water, foliage, grain, confetti, and fast sports need more data to look acceptable. A size that works for an interview will not work for them.
- The platform will compress it anyway. Video platforms re-encode uploads. Feeding them a heavily compressed file means two rounds of loss. If the upload limit allows it, send the better file.
- Detail is the point. Product close-ups, tutorials with small interface text, medical or technical footage.
If the only obstacle is a size limit, consider the alternatives before compressing harder. Removing footage you do not need with Trim Video reduces duration without forcing the wanted footage into a smaller data budget. The trim may still be re-encoded, so review its output too. Sharing a link from cloud storage avoids the limit altogether.
Keep the master file
The master, or source, is the highest-quality version of your video. Treat the compressed file as a delivery copy made for one purpose, and treat the master as the thing you keep.
- Do not delete or overwrite the source after compressing.
- Name the copies clearly, for example "launch-video-master.mov" and "launch-video-email.mp4."
- When you need another size later, make it from the master.
- Do not assume the compressed copy carries everything the source had. Extras such as additional audio tracks, embedded subtitle tracks, HDR information, or metadata may not be preserved, which is one more reason to keep the original.
Conclusion
You cannot make a video much smaller with no loss at all, but you can usually make the loss hard to see. Start from the original, use the Basic preset or a quality target, compress once, and inspect the hard scenes before you trust the result. When the content is demanding or the file will be reused, accept a larger file, and always keep the master.
Ready to try it on your own footage? Open the Compress Video tool, choose Basic or set a quality target in Advanced settings, and compare the download with your source before you share it.
Frequently asked questions
Can I compress a video without losing quality at all?
Not with standard lossy compression. Some information is always discarded. At gentle settings, the difference is usually too small to see at normal viewing size. Truly lossless video formats exist, but they produce very large files and are not what this tool outputs.
Which preset should I choose to protect quality?
Basic. It puts visual quality ahead of maximum reduction. Super keeps quality high at a smaller size with H.265, if your audience's devices can play it. Choose Strong only when a small file matters more than the picture, and check the result carefully. For the most control, use a quality target (CRF) in Advanced settings.
Does the tool show how much quality I will lose?
No. There is no quality score. For presets and size targets, the tool shows an estimated output size, which tells you how much data is removed, not how the result will look. Download the result and compare it with the source yourself, using the busiest, darkest, and most detailed scenes.
Why does my compressed video look blocky in dark scenes?
Dark, noisy areas are hard to compress, and encoders tend to give them less data. Blocky shadows mean the compression was too strong for this footage. Go back to the source and use the Basic preset or a lower CRF, or accept a larger file.
Is it OK to compress a video that was already compressed?
Avoid it when you can. Each lossy pass adds to the damage. If a compressed copy is all you have, use the gentlest setting that meets your size need, and do it only once.
Will compression change my video's resolution or frame rate?
The tool does not offer resolution or frame-rate controls. The frame size and frame rate stay as they are; the tool changes how the video is encoded, not its dimensions. If you need specific frame dimensions, set them separately with Resize Video, then check the properties of the final file.